Contents
When it comes to accounting software, Quickbooks is the top choice. One of the many features that make this program great is its ability to organize and print checks. However, printing checks manually can take quite some time and energy, not to mention the amount of paper that is used up unnecessarily. Instead of going through all these hassles, learn how check printing with QuickBooks online can help you save hours on your work.
Why use QuickBooks online for check printing
QuickBooks Online for printing checks can be a great way to print checks without having to leave your desk. It can easily print checks without having to log in to QuickBooks, and it can even print checks while you’re working on other applications. Here are some tips for using QuickBooks online for check printing:
#1 Choose the correct template.
You can print checks using a variety of templates, but some options may be more appropriate for certain situations. For example, if you want to print numerous checks quickly, you might select a custom check template. Alternatively, if you just need a quick and easy way to print checks, you can use one of the pre-made templates.
#2 Select the right printer setting.
Before you start printing your checks, make sure that your printer is set up correctly. You’ll need to specify the number of checks that you want to print per sheet and the layout (portrait or landscape) of each check. You can also specify whether you want your prints to include register marks.
#3 Connect to QuickBooks online.
Once you’ve set up your printer settings, connect your computer to the internet and open your QuickBooks online account. You’ll be prompted to log in before you’re able to print checks.
How To Check Print With Your QuickBooks Online Account
There are a few things to keep in mind when using QuickBooks Online Check Printing. First, make sure that you have the correct software and hardware setup. Second, be sure to understand the various check printing options available to you. Finally, be sure to use the correct formatting when printing your checks.
Steps for a standard online check printing-
QuickBooks Online is simple and straightforward. Follow these steps to get started:
- Open the QuickBooks Online account you want to use for your check printing transaction.
- Click the Checks tab in the Accounts view.
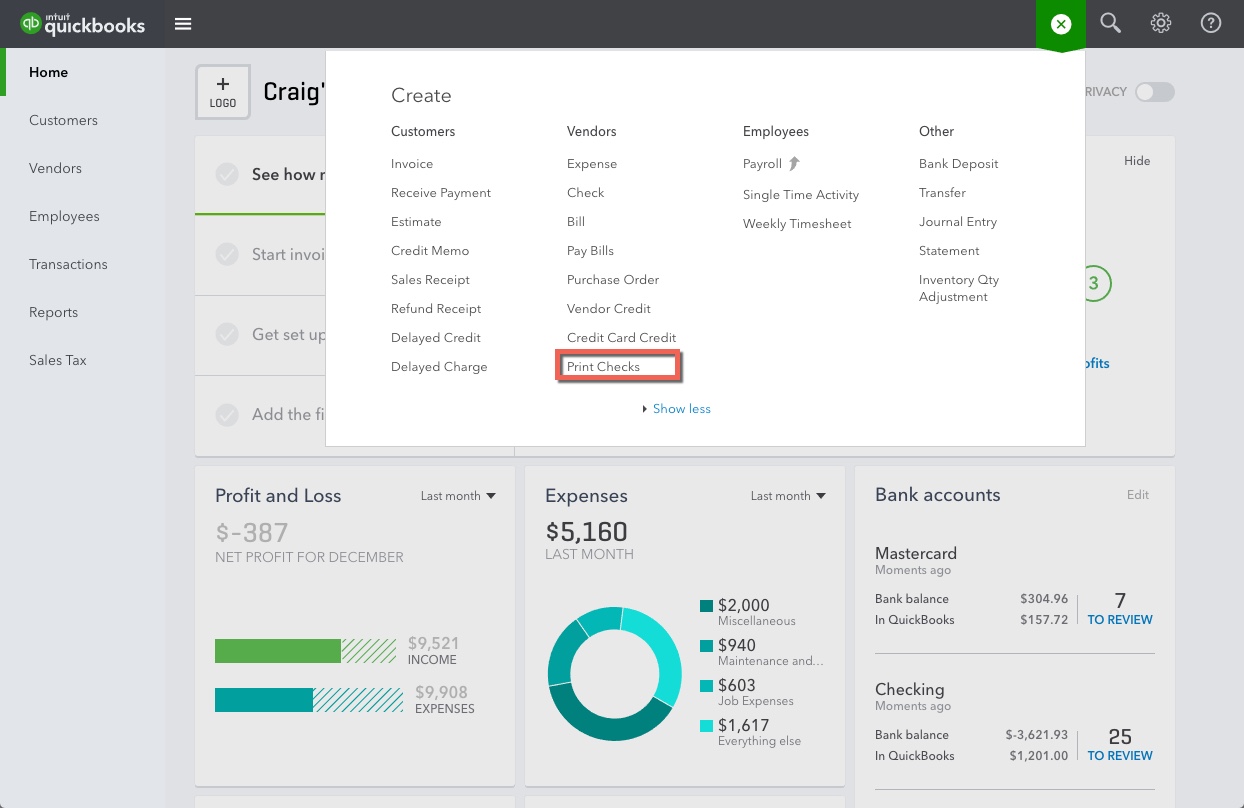
- Click the Print Checks button at the top of the Checks tab.

- Select the checks you want to print from your checking account, and then click the Print button at the bottom of the Checks tab.
- Review your print jobs and click Finish to complete them.
Printing and saving a receipt after an online check printing transaction
If you’ve ever printed out a receipt after completing an online check printing transaction, you know that the process can be a bit cumbersome. Here’s a complete guide to quickly printing and saving your receipt after an online check printing transaction.
- Log in to your QuickBooks Online account.
- Click the “Receipts” tab on the left side of the screen.
- Click the “Print” button next to the appropriate receipt record.
- Select the printer you want to use from the drop-down menu that appears.
- Click the “Print” button again to confirm your selection.
- Save your receipt printout to your computer.
Conclusion
QuickBooks Online Check Printing can be a huge time-saver for business owners. Follow the given tips on how to customize your check printing experience based on your business needs. So whether you need to quickly print out checks as a way of tracking expenses, or you just need a quick and easy way to handle payments, this is the software you need!

