In the modern world, videos have become an essential part of our daily lives. They are used for entertainment, education, and marketing, among other purposes. However, creating professional-quality videos can be a daunting task, especially for beginners. Fortunately, there are many video editing tools available in the market, and one of the best is MiniTool MovieMaker.
MiniTool MovieMaker is a free video editing software that is designed to make the video creation process simple and intuitive. It comes with a wide range of features that enable users to create professional-quality videos without any hassle. In this article, we will explore how to use MiniToolMovie Maker to create professional videos.
Getting Started with MiniTool Movie Maker
Before we dive into the details of creating professional videos with MiniTool MovieMaker, let’s first take a look at how to get started with this tool.
Step 1: Download and Install
The first step is to download and install MiniTool MovieMaker 5.4 on your computer. You can download it for free from the official website. Once you have downloaded the installation file, run it to begin the installation process.
Step 2: Launch MiniTool MovieMaker
Once the installation is complete, launch MiniTool MovieMaker 5.4 by double-clicking the desktop shortcut or searching for it in the Start menu.
Step 3: Import Your Media Files
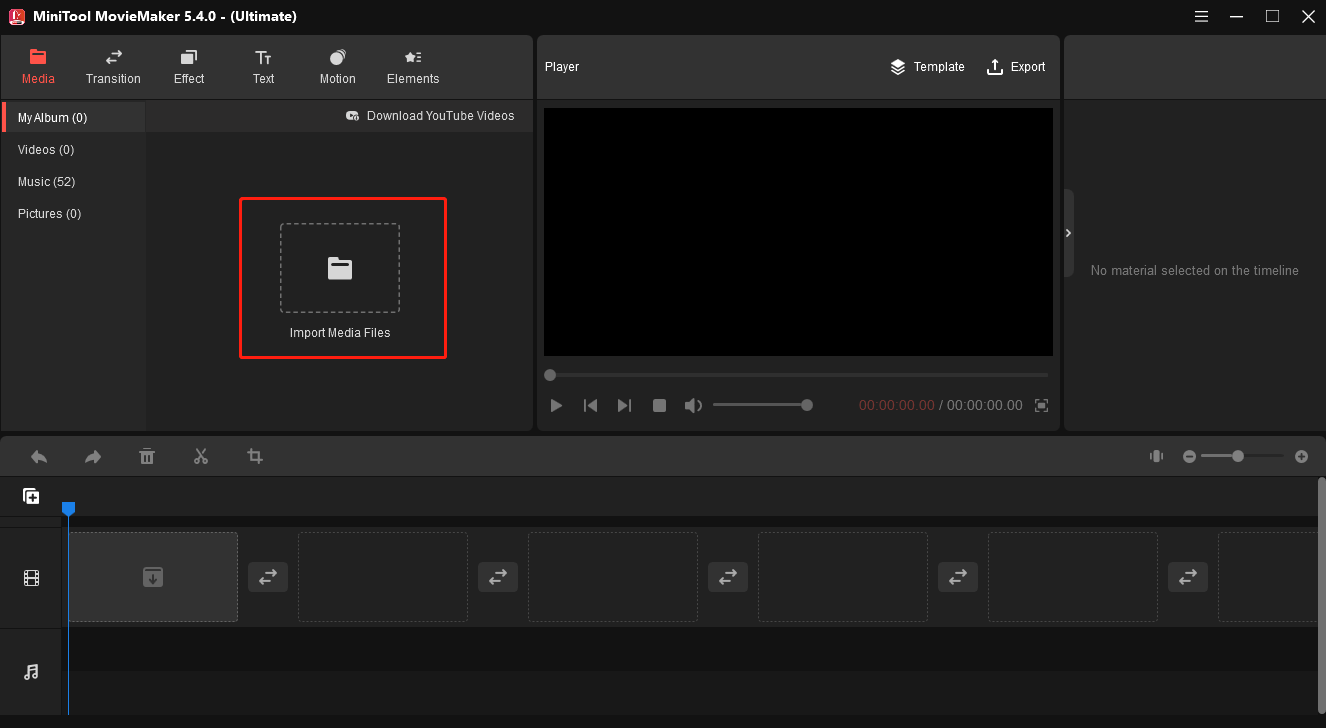
To begin creating your video, click on the “Import Media Files” button in the main interface. This will allow you to select the media files that you want to include in your video. You can import video, audio, and image files.
Step 4: Arrange Your Media Files
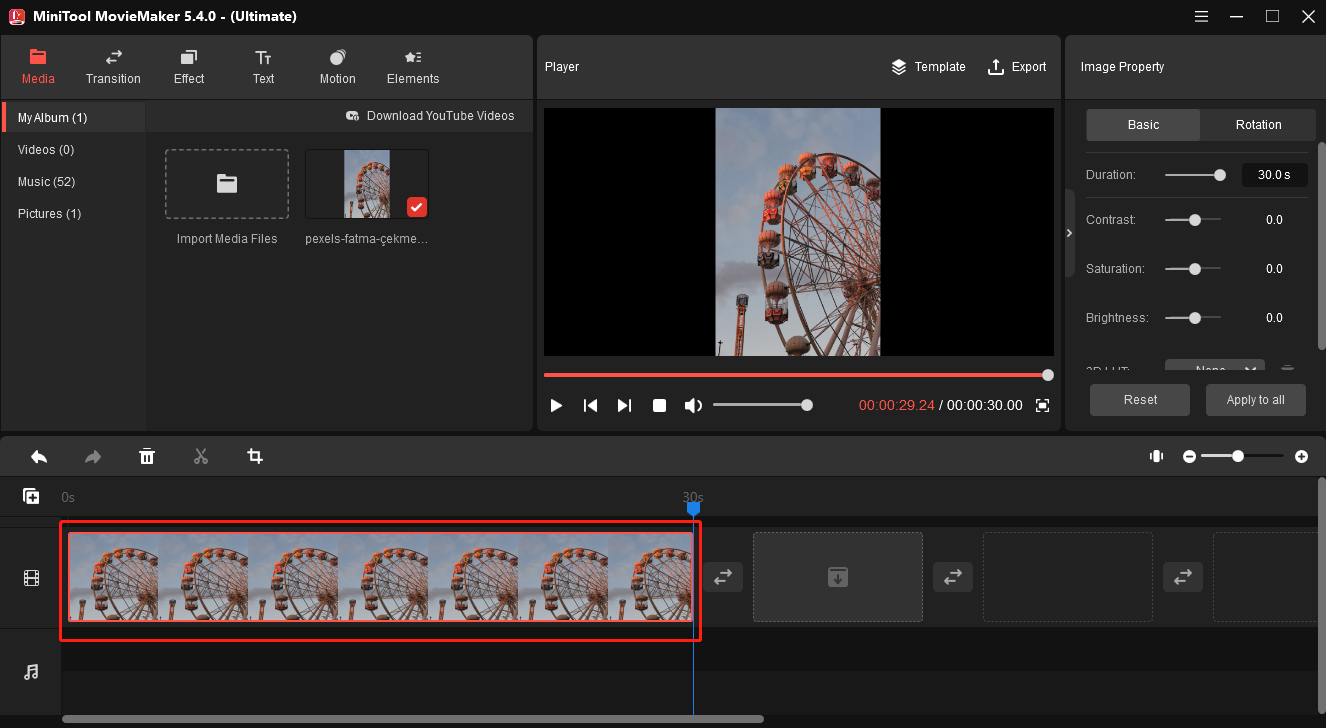
Once you have imported your media files, you can arrange them in the order that you want them to appear in your video. Simply drag and drop the files to the timeline in the order that you want them to appear.
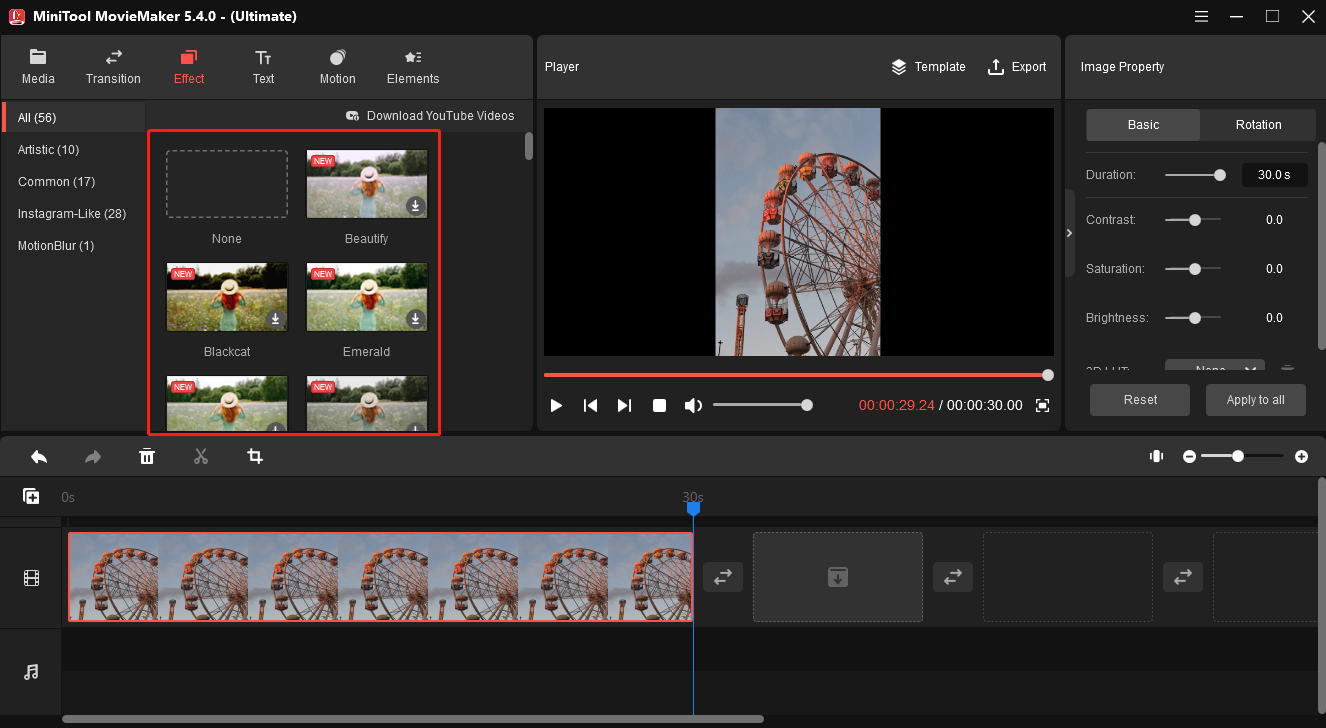
Step 5: Add Transitions and Effects
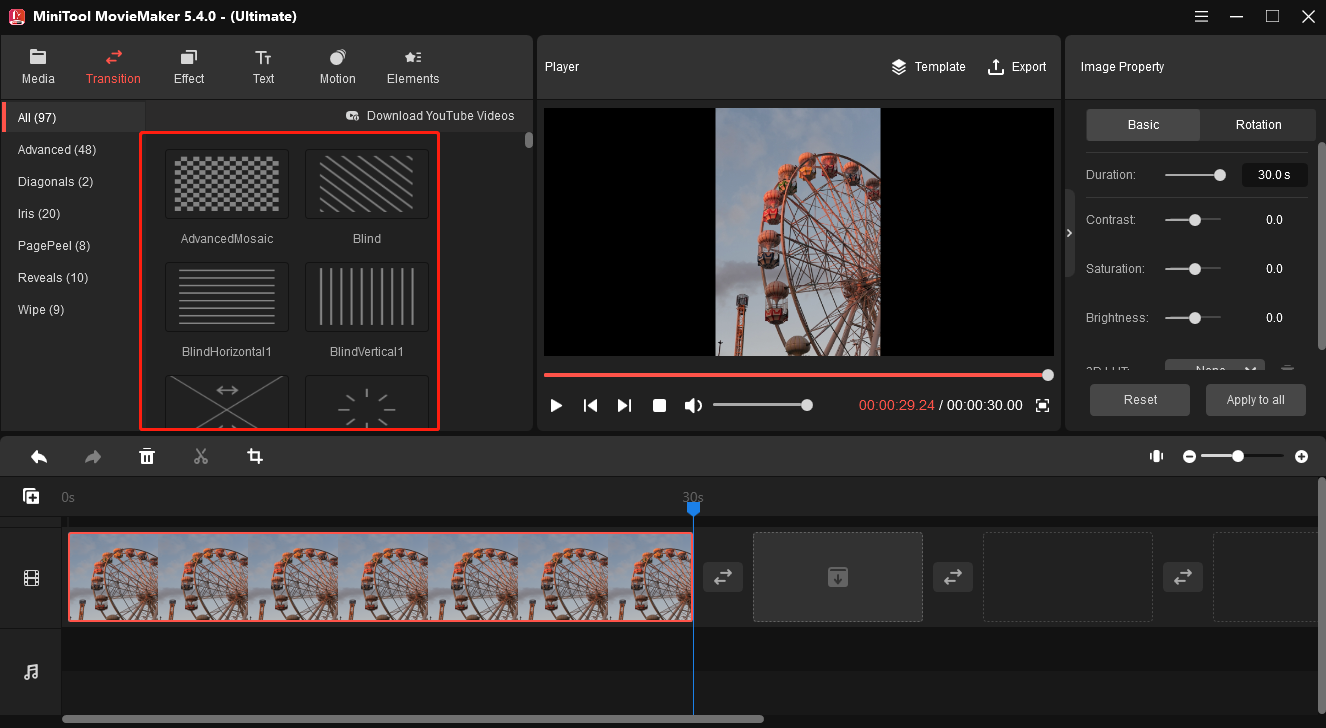
To add transitions and effects to your video, click on the “Transition” and “Effect” tabs in the upper-right corner of the interface. This will bring up a list of available transitions and effects that you can apply to your video. Simply select the transition or effect that you want to use and drag it onto the timeline between two media files.
Step 6: Add Music to Your Video

To add music to your video, click on the “Add Music” button in the main interface. This will allow you to select the music file that you want to use. Once you have selected your music file, drag and drop it onto the timeline. You can also adjust the volume of the music by clicking on the music file and dragging the volume slider.
Step 7: Preview and Export Your Video
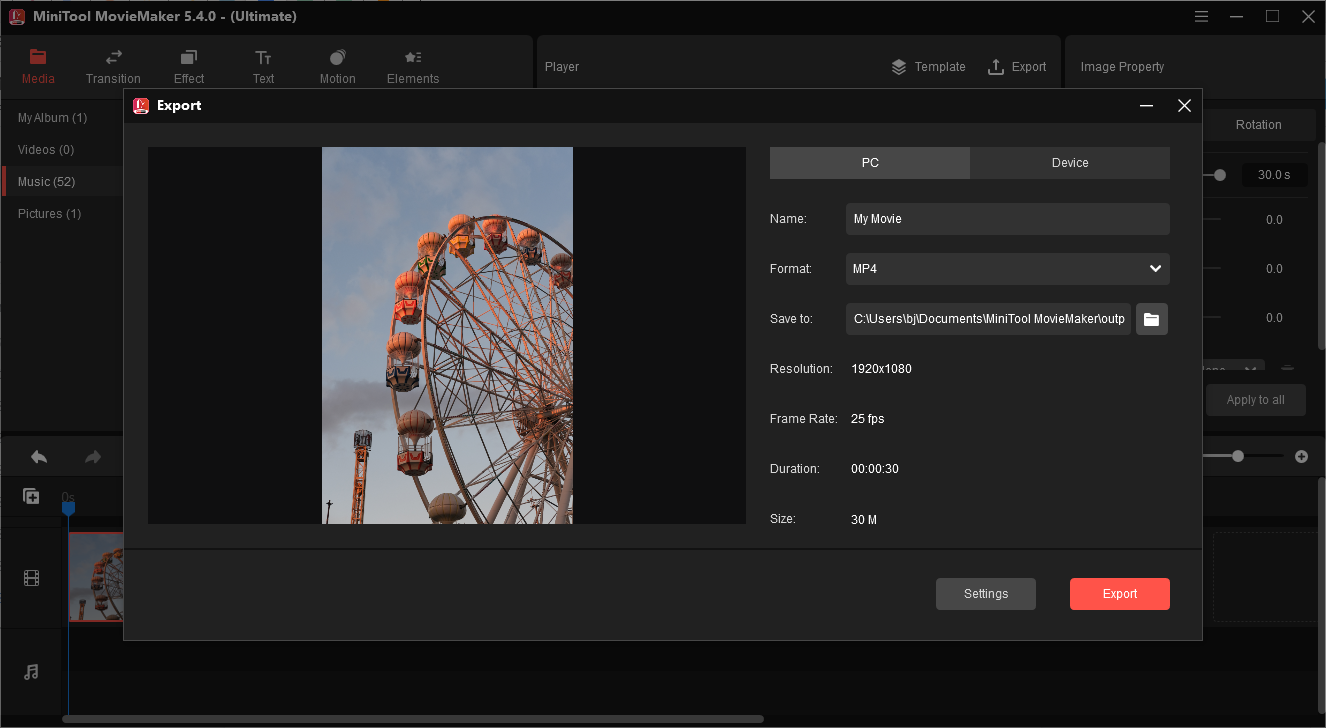
Once you have completed editing your video, you can preview it by clicking on the “Preview” button in the main interface. If you are satisfied with your video, you can export it by clicking on the “Export” button. MiniTool MovieMaker supports a wide range of video formats, including MP4, AVI, WMV, and MOV.
Conclusion
MiniTool MovieMaker is a powerful video editor that enables users to create professional-quality videos without any hassle. With its intuitive interface, wide range of features, and templates, MiniTool MovieMaker is an excellent choice for beginners and professionals alike. Whether you are creating videos for entertainment, education, or marketing purposes, MiniTool MovieMaker has everything you need to make your videos stand out. So, if you want to take your video creation skills to the next level, give MiniTool MovieMaker a try and see how it can transform your videos into works of art.