

Importing PST file(s) to Office 365 is a common requirement during migration, backup, and restoration, or when trying to move data from an old Outlook setup. However, you can manual import PST file using Outlook, but only one file at a time can be transferred. And if you choose native Network Upload or PowerShell commands for importing PST files, then you may face several operational or technical issues. Through this guide, we will show you how to import PST files to Office 365 without PowerShell.
Why Do Users Prefer to Import PST Files to Office 365 Without PowerShell?
The official PowerShell method provided by Microsoft requires users to:
- Install the AzCopy tool separately
- Setup import job in Microsoft Purview
- Upload PST file using PowerShell commands
- Create CSV mapping files
This makes it quite tedious and error prone, especially for non-technical users, to import PST files to Office 365. Besides, the process requires Global Admin privileges and can take hours or days depending on the size of the PST file.
How to Import PST Files to Office 365 Without PowerShell? (Bulk Import)
If you are looking to import PST files to Office 365 without Powershell, consider using a dedicated solution. Kernel Import PST to Office 365 is capable of handling and importing multiple PST files at once into Office 365. You can easily import the entire Outlook PST mailbox with precision. Moreover, the software comes with a free trial version which allows users to test all the functionalities before purchasing the full version.
- No PowerShell required to migrate PST files with Kernel PST Import.
- No Outlook installation needed on your system.
- There are no PST file size limitations.
- Direct import to Primary, Archive, and Shared mailboxes.
- Apply item type filters to save emails, tasks, contacts, etc. specifically.
- Bulk import of multiple PST files to multiple Office 365 mailboxes.
- Keeps folder hierarchy and integrity intact.
- Run multiple import jobs simultaneously.
Steps for PST to Office 365 Migration Without PowerShell
Here are the detailed steps for PST to Office 365 migration without PowerShell. Follow them carefully for successful results:
- Launch the tool and click on the Add button under Add Source, then select the PST file.
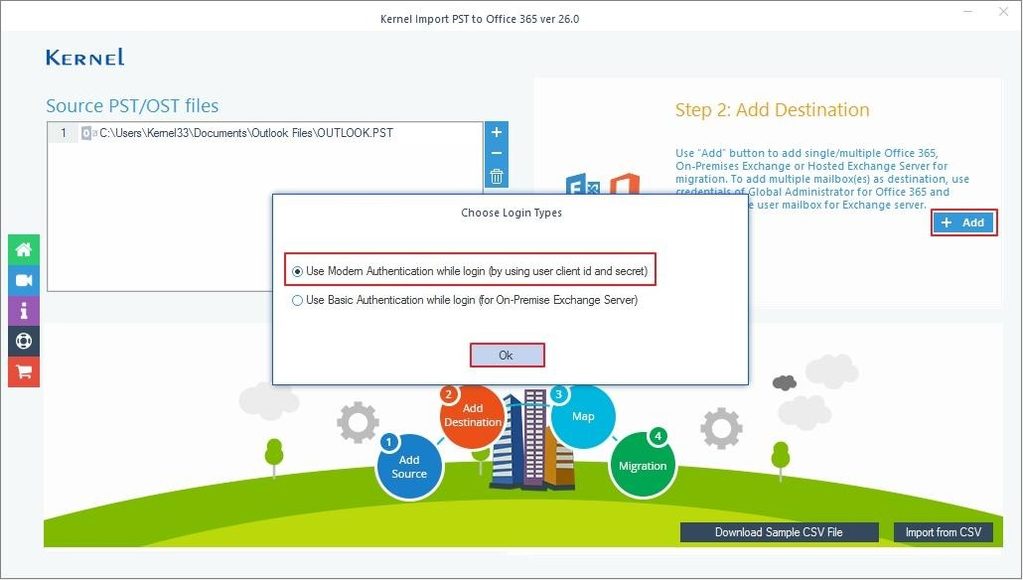
- Click on Add button under Add Destination, then select Use Modern Authentication while login and click OK.
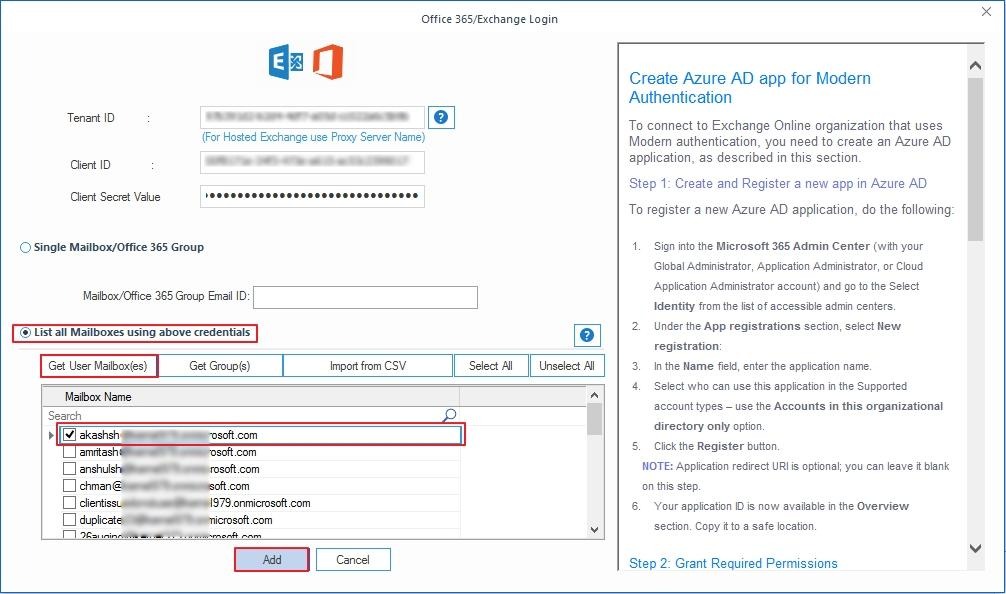
- Enter Tenant ID, Client ID, and Client Secret Value, then select List all Mailboxes using above credentials.
- After that, click on Get User Mailbox(es) and wait for the software to list all the mailboxes. Now, select the required user mailbox and click Add.
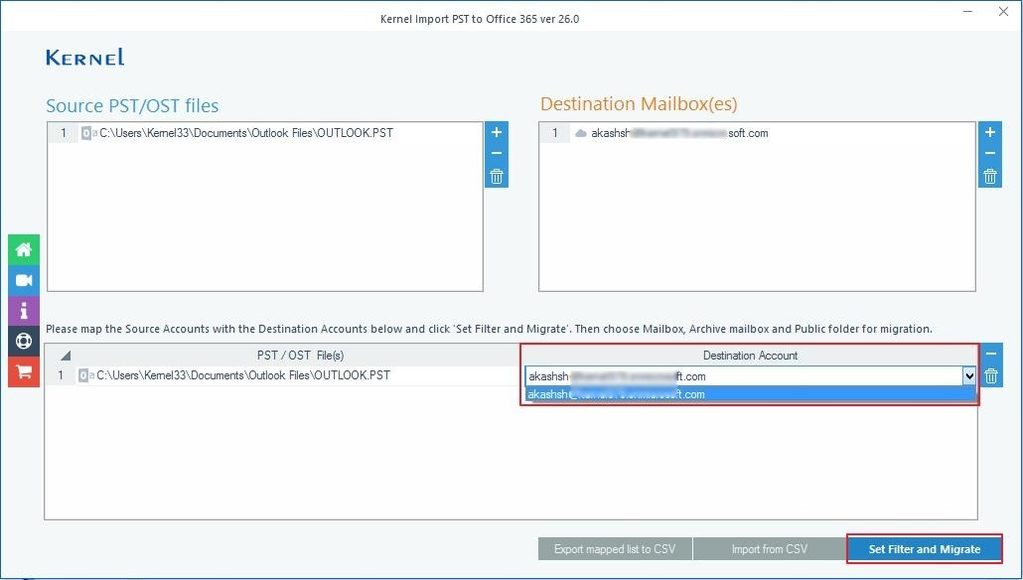
- Moving forward, map the source PST file(s) with destination accounts and click Set Filter and Migrate.
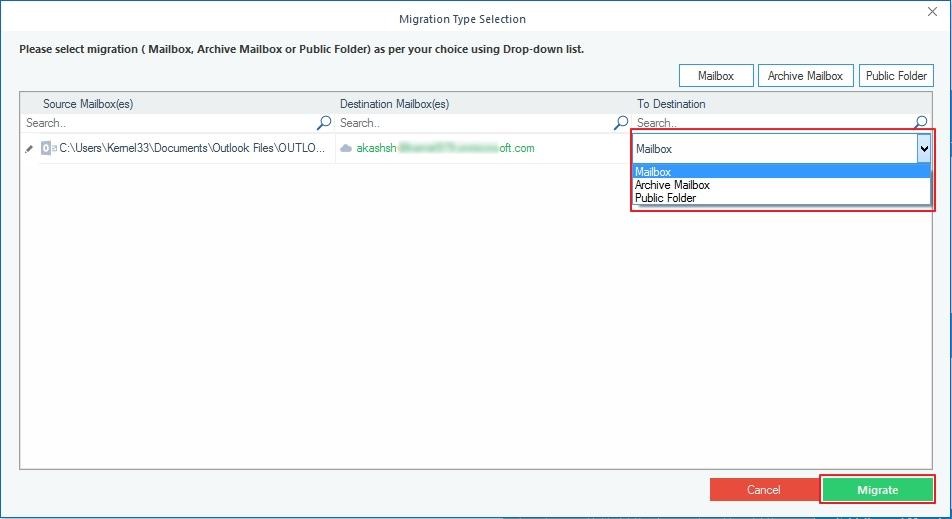
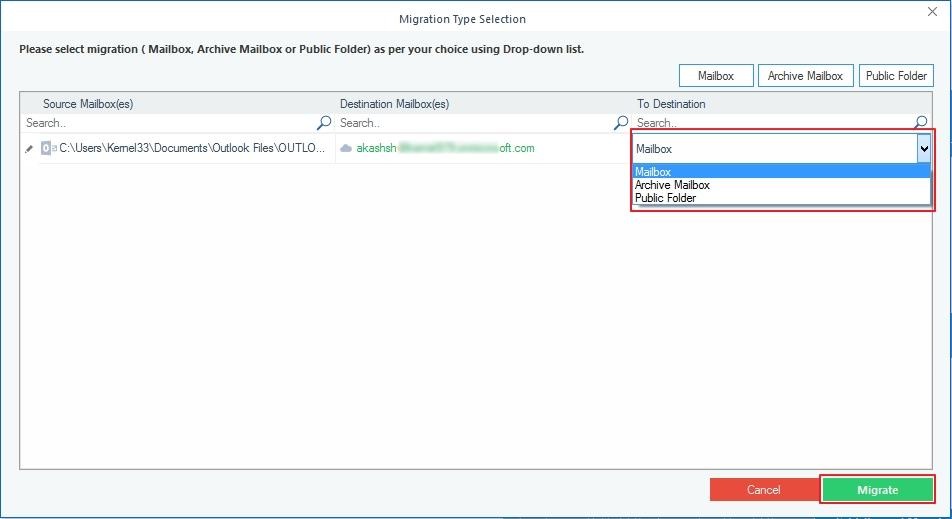
- Choose the migration type from Mailbox, Archive Mailbox, and Public Folder, then click Migrate.
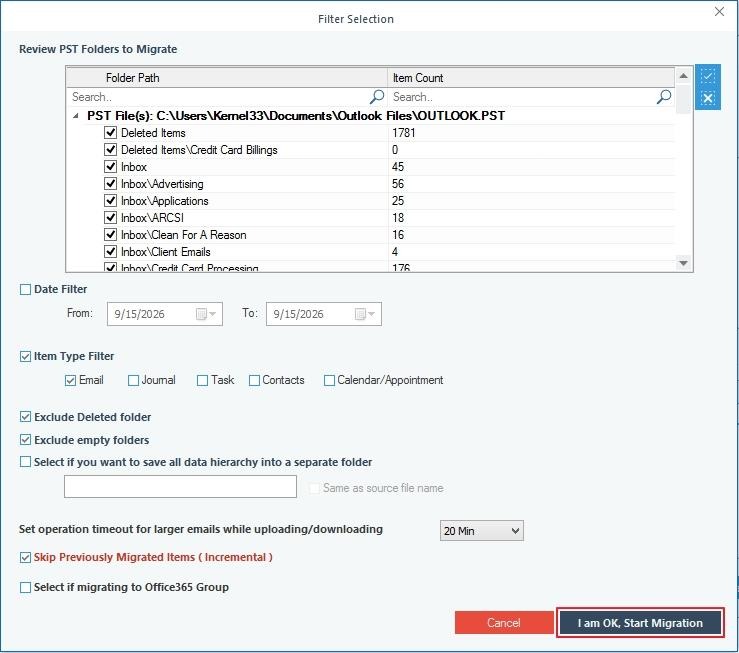
- Here, you can apply different filters to import selective data from the PST file, then click I am OK, Start Migration.
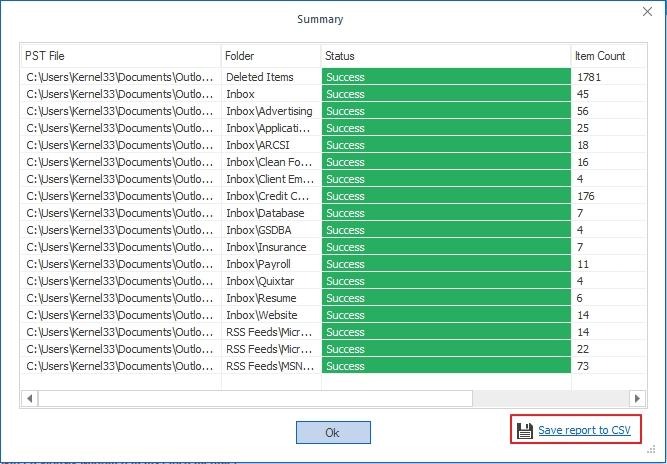
- Wait for the software to complete the PST to Office 365 migration without PowerShell.
- Once done, you can click on the Save report to CSV option to keep import progress saved on your system for future reference.
In this way, you can import as many PST files as you want to Office 365 with full data integrity.
Last Say
While it is possible to import PST files to Office 365 without PowerShell, the process is quite time-consuming and error-prone. Organizations or IT administrators dealing with multiple PST files to be imported to Office 365 should consider using a specialized tool to save time and ensure data integrity.
Frequently Asked Questions
Q. How can I manually import PST files to Office 365 without PowerShell?
Ans. To manually import PST files to Office 365 without PowerShell, use Microsoft’s Outlook desktop application or Microsoft Purview Import Service.
Q. Does the manual method to import PST files to Office 365 without PowerShell offer filters?
Ans. No, the standard manual methods (Network Upload or Outlook’s import/export wizard) do not offer filters to import PST files to Office 365 without PowerShell.