Contents
- 1 What causes Nvidia GeForce experience error code 0x0001?
- 2 Method 1- Nvidia GeForce experience something went wrong error code 0x0001? Try Installing GeForce Experience Beta!
- 3 Method 2- Error code 0x0001 NVidia GeForce experience? Try allowing NVIDIA Container services to communicate with the local account.
- 4 Method 3- Nvidia GeForce experience error code: 0x0001? Ensure that the Nvidia folders are owned by SYSTEM.
- 5 Method 4- Geforce experience error code 0x0001? Use a special utility to uninstall Geforce Experience and the current Display Driver.
- 6 Method 5- Nvidia GeForce error code 0x0001? Attempt to Repair a Registry Error!
- 7 Conclusion
NVIDIA’s proprietary program, GeForce Experience, allows you to optimize games and update your drivers.
If you receive a 0x0001 error when attempting to launch GeForce Experience, consider switching container services or reinstalling the software.
Check out our in-depth NVIDIA Page for more information and tips on GeForce Experience and how to optimize game performance.
When you encounter issues with your Windows PC, keep in mind that our Troubleshooting Section contains hundreds of tips on resolving hardware and software difficulties.
What causes Nvidia GeForce experience error code 0x0001?
We studied this specific issue by reviewing many reports as well as the repair procedures that are usually utilized to remedy this particular problem. According to our findings, the problem could be caused by one of two common culprits:
- GeForce Experience Issue – As several users have noted, this issue could be caused by an internal bug that is now appearing with the most recent ‘stable’ release. Several impacted users stated that the problem was rectified after installing GeForce Experience Beta.
- NVIDIA container services do not have the authorization to connect with the local account. The NVIDIA Telemetry container service, as well as a few other services, are known to create this issue if they are not allowed to speak with the local account. In this scenario, you can fix the problem by altering some settings on the Services screen.
- Nvidia Folders Aren’t Owned by System – This problem can occur if the Nvidia folders aren’t owned by the system. Several impacted customers stated that they were able to address the problem by changing the ownership of each Nvidia folder to the System.
- File corruption – As it turns out, this error message can also be caused by file corruption within the Nvidia folder or by a corrupted display driver. Because some customers have been unable to uninstall the utility using traditional methods, we recommend utilizing a particular program capable of deleting GeForce Experience as well as the accompanying display drivers before reinstalling them in a clean installation.
- Installation Location: In some circumstances, Geforce Experience must be installed on the OS drive in order to function correctly. This is usually the computer’s “C” drive.
If you’re having difficulties resolving the same GeForce Experience issue number, this article will walk you through many troubleshooting steps. You’ll find a list of solutions that other impacted users have used to resolve the problem in their specific case down below.
We recommend you to follow the potential fixes in the order that they are offered because they are arranged by efficiency and severity. Regardless of your specifics, one of these will undoubtedly resolve the problem.
Method 1- Nvidia GeForce experience something went wrong error code 0x0001? Try Installing GeForce Experience Beta!
Some impacted users claimed that the problem was resolved after uninstalling their current Nvidia Experience version and installing the new Beta version through the dedicated installer. Affected users believe this version contains a hotfix that has not yet been merged with the central installation.
We recommend that you begin with this strategy because it has been proven to be beneficial to a large number of people. Here’s a step-by-step method to removing your current GeForce Experience installer and installing the most recent Beta build:
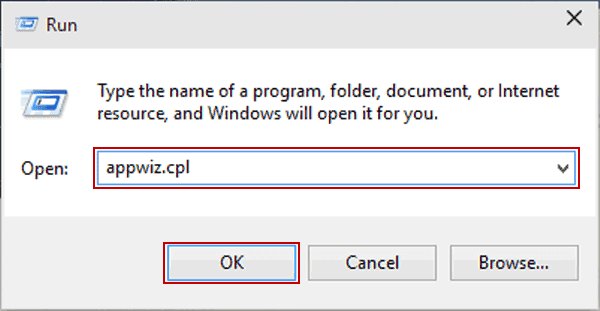
- Step 1- To launch the Run dialogue box, press Windows key + R. Then, in the Programs and Features window, type “appwiz.cpl” and hit Enter.
- Step 2- Scroll through the list of applications in the Programs and Features section until you find Nvidia Experience. When you find it, right-click on it and select Uninstall to start the uninstallation process.
- Step 3- To begin the uninstallation of Nvidia GeForce Experience, follow the on-screen prompts and confirm.
- Step 4- Restart your computer once the application has been uninstalled.
- Step 5- At the next startup, go to this link to get the most recent Beta version of Nvidia Experience.
- Step 6- To finish the installation, simply follow the on-screen directions. Don’t launch the application until the process is completed. Instead, restart your computer once again.
- Step 7- Open GeForce Experience Beta again at the next startup to see whether you still see the problem.
- Step 8- If you are, follow the same steps as before and try to download and install an older version of Geforce Experience from the internet, such as this one.
- Step 9- Also, make sure to install Geforce Experience on your computer’s OS drive rather than any other.
If you continue to receive the Error Code 0x0001 when attempting to launch the utility, proceed to the following method below.
Method 2- Error code 0x0001 NVidia GeForce experience? Try allowing NVIDIA Container services to communicate with the local account.
As it turns out, another probable cause of this problem is when a service used by GeForce Experience (NVIDIA Telemetry Container service) lacks the essential rights to correctly connect with the local account.
In most cases, the NVIDIA Telemetry Container service is to blame, but in other circumstances, the issue was only rectified after the affected users changed the settings for all NVIDIA Container services. Here’s a little tutorial on how to accomplish it:
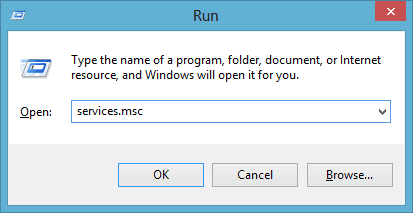
- Step 1- To launch the Run dialogue box, press Windows key + R. Then, to open the Services panel, type “services.msc” and hit Enter. If the UAC (User Account Control) prompts you, select Yes to allow administrator privileges.
- Step 2- Scroll through the list of services until you find the four Container services that NVIDIA employs.
- Step 3- When you find them, right-click the first container service and select Properties.
- Step 4- Navigate to the Log On tab within the Properties page and ensure that the toggle linked with the Local System account is checked.
- Step 5- Make sure the Allow service to interact with the desktop box is ticked, then click Appy to save the changes.
- Step 6- Steps 3, 4, and 5 should be repeated for the remaining Nvidia container services listed on the Services page. Also, make sure you click the “Start” option if none of them is already running.
- Step 7- Restart your machine once all NVIDIA container services have been set to allow the service to interface with the desktop.
- Step 8- Open Nvidia Experience one again at the next startup to see if the problem has been rectified.
If you continue to receive Error Code 0x0001 when attempting to open Nvidia Experience, proceed to the next procedure below.
Note: You should also start and configure all Nvidia services to “Automatic” to ensure that all essential services are functioning and maybe started on startup.
Method 3- Nvidia GeForce experience error code: 0x0001? Ensure that the Nvidia folders are owned by SYSTEM.
As it turns out, this problem can also arise if the directories utilized by NVIDIA lack the proper permissions. Some impacted users were able to address the issue by changing the folder’s ownership to SYSTEM. To be effective, you must repeat this process for all NVIDIA folders on your machines.
Here’s a little tutorial on how to accomplish it:
- Step 1- Navigate to the following location in File Explorer:
C:\Program Files (x86)
Note- Please keep in mind that this guide is just for those who have a 64-bit architecture. If you’re using 32-bit Windows, you’ll simply need to change the rights in C: Program Files.
- Step 2- Select Properties from the context menu when you right-click on NVIDIA Corporation.
- Step 3- Go to the Security tab in the Properties screen and choose the Advanced button (under Permissions for ALL APPLICATION PACKAGES).
- Step 4- Ensure that the Owner is set to SYSTEM in the Advanced Security Settings. If it isn’t, select Change.
- Step 5- Enter System in the box labeled Enter the object name to choose, then click Check Names, then Ok.
- Step 6- To save the current permission set, click Apply.
- Step 7- Navigate to the following location in your device- C:\Program Files
Method 4- Geforce experience error code 0x0001? Use a special utility to uninstall Geforce Experience and the current Display Driver.
Several concerned users stated that the problem was resolved only after they used a specific display driver uninstaller to delete both the current version of GeForce Experience and the display drivers that support it. This is identical to doing a graphics driver uninstall.
There are various utilities that can do this automatically for you. However, after trying several tools, we recommend using the Display Driver Uninstaller. It’s free, simple, and dependable.
Here’s a simple method to utilizing Display Driver Uninstaller in conjunction with GeForce GeForce Experience and the current display driver:
- Step 1- To download the most recent version of Display Driver Uninstaller, go to this page (here).
- Step 2- Once the download is complete, use an extraction program such as 7Zip or WinZip to extract the DDU archive’s contents.
- Step 3- To unpack the utility’s contents, double-click the DDU executable, select a convenient place, and then click Extract.
- Step 4- When the extraction is finished, double-click Display Driver Uninstaller and select Yes at the UAC prompt (User Account Control).
- Step 5- Select GPU from the Select device type drop-down selection within the Display Driver Uninstalling window. Then, to begin the cleanup process, click on Clean and restart.
- Step 6- When the process is finished and the next computer setup is complete, go to this link (here). Then, before you start searching, choose your GPU, operating system, and language. Then, follow the on-screen instructions to install the most recent Game Ready Driver.
- Step 7- Download the most recent Nvidia GeForce Experience build from this site (here). When the download is finished, follow the on-screen instructions to finish the installation.
When you restart the utility, you should no longer see the Error Code 0x0001.
Method 5- Nvidia GeForce error code 0x0001? Attempt to Repair a Registry Error!
In some circumstances, a registry problem may be causing this problem and preventing the drivers from operating properly, and we will solve it using the approach described below.
- Step 1- To open the Run prompt, press “Windows” + “R.”
- Step 2- Enter “Regedit” and then press the Enter key.
- Step 3- Go to the following address.
Computer\HKEY_LOCAL_MACHINE\SOFTWARE\Microsoft\Windows\CurrentVersion
- Step 4- Examine the “ProgramFilesDIR” items on the right side, paying attention to the “Data” setting.
- Step 5- What happens is that their address may be lacking the “following the disc name and should be something like “C: ProgramFiles (x86)” instead of “C: ProgramFiles (x86)”.
Check to see whether the problem persists after altering the value.
Conclusion
I hope all the points mentioned in this article for the GeForce experience error code 0x0001 error were helpful to you! If you have any queries or questions related to this article drop down a comment.