Do you want a Minecraft Water Elevator? Well, if yes, then you are at the right place as in this article, we will tell you how you can build a working elevator in Minecraft. While it is feasible to construct an elevator utilizing advanced Survival mode, you will for the most part need to make this elevator in Creative mode or shape, right?/The elevator format we will tell you in this article will deal with work on desktop, Pocket Edition, and console versions of Minecraft (including the Nintendo Switch).
Contents
Step 1: Creating the Minecraft water Elevator’s Base:
- First of all, you need to create the foundation. You need to make a four-block-wide, three-block-long, and four-block deep hole. You also need to ensure that you do all this below the area from which you want your elevator to launch.
For instance, in case that you have a basement’s foundation laid out, you are required to dig a hole in the bottom of the basement’s foundation.
- Now all you need to do is, face a three-block-wide side. It does not make any difference in which side of the foundation you face.
- Now you have to replace the center or middle block in the second line of the floor with obsidian. This implies that the first row or line of the floor out from the three-wide wall will have no obsidian, yet the following row will have a block of obsidian rather than a block of dirt (or stone, or whatever the floor’s material is).
- Here on, you have to reposition yourself. Just stand on the backside of the obsidian block and face the four-block-wide side. However, you need to make sure that the shorter side of the foundation is placed to your right and the longer end is to your left.
- Now, you have to take away the block between the obsidian block and the wall, which will create a one-block-deep hole in the floor of the foundation.
- Also, let us tell you that you also have to remove a one-block perimeter from the foundation. At this point, the foundation should be 5 blocks wide, 4 blocks long, and 4 blocks deep. We are hoping you are going well so far?
- Here, at this point, you have to reposition yourself yet again. Now, you need to face the obsidian with the foundation’s shorter end which is on your left, and the longer end to your right.
- Now, you have to add observer blocks. For that you need to put up an upward-facing observer on the topmost part of the obsidian, after that you are required to add an upward-facing observer two blocks up and one to the left.
- In this step, you have to remove the block by touching the bottom-left corner of the obsidian. At this point, we expect that you will have a two-block-wide, one-block-deep trench between you and the obsidian block. All going good so far right?
- When you are done with the above-mentioned step, you are required to add slime blocks that will go on top of (but not in) the trench.
- Now you have to add your sticky pistons. You will put a vertical sticky piston on the right-most sludge or slime block and a downward sticky piston on the furthest left slime block. You may need to dig an impermanent hole to get the right angle needed to put a place downward-facing sticky piston.
- Now, you are required to put up a slime block on top of each of the sticky pistons which will lead you to the creation of the base for your elevator floor.
- Now, take the elevator’s floor and place a block that you like on top of every slime block. You currently have that will go about as the moving piece of the elevator.
Step 2: Creating the Elevator’s Switch
- First of all, you need to place a regular piston. Here you have to face up the three-wide wall which will make sure that the bottom observer block is on your right. After doing so, you need to place the piston on the floor block in front of you. Make sure that the piston is facing you and touching the corner of the observer block. You need to make sure the space directly in front of the observer block is free.
- Now, you have to put up a stone block behind the piston. Remember that this block has to go directly behind the piston, and there should be one row of space between the block and the back wall.
- Make a stone “staircase” shape. For that you have to put up a stone block one up and one right from behind the piston, after that, you need to put up another stone block one up and one right from there. You ought to have a bunch of three stone blocks behind the piston in a form of a staircase shape.
- Here, you have to add a stone block directly over the top staircase block at ground level. This implies you will need to put a block on top of the top staircase block. Now place a stone block on top of that, and after that remove the first block that you place.
- You know that you also need to add Redstone dust to the staircase. For that you have to choose redstone dust in your inventory, after that, just select each of the three descending stone blocks. You have to leave alone the floating stone block that you placed in the last step empty.
- In this step, you need to add a button to the floating stone block, on the side of the stone block which is facing your elevator’s floor.
We recommend that you do not press the button. If you do so it will cause the elevator floor and base to fly into the sky. Got our point?
Step 3: Bringing the top of the elevator into existence:
Design the proxy/placeholder column on the top surface of the observer block. The one-block-width blocks are to be placed on top of the top observer. You can design/create as many blocks as you want to make your elevator go to incredible heights.
The next step would involve you placing an obsidian block on top of the placeholder. This is an important step because this will function to stop the elevator from travelling up forever.
Remove the placeholders and all the blocks from that column. Leave the obsidian block as it is because it is your endpoint.
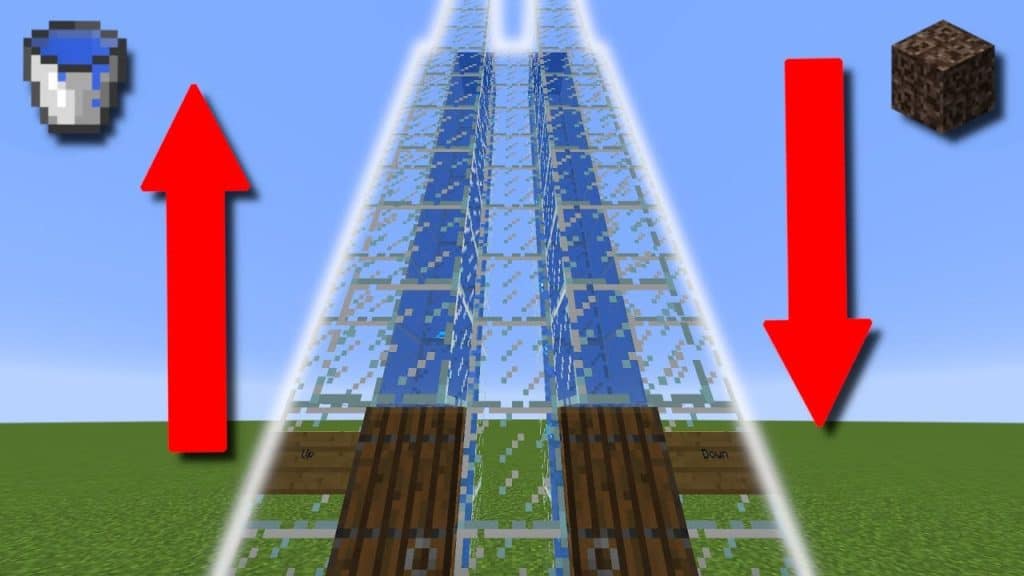
Work the elevator hard to see if it functions properly or not. This is how you will do it. The elevator will travel up once you press the button next to it. It will keep on moving until the moment it hits the obsidian block.
Place a piston. Here’s how you can do it. Face the floor with the obsidian block and place a placeholder on the right side of the observer block that is below the obsidian and place a piston on the block to your left.
Remove the placeholder block after placing the piston and after this step, you will be left with a left-facing floating piston.
A total of three blocks are to be placed behind the piston. All three blocks are to be placed one behind the other.
The next step involves you pasting a floating stone block above the third stone block. Place a block on top of the rightmost block, another stone on top of that and then remove the first block explained earlier in this step.
Redstone is to be placed on the three block column. What you’ll see now is the three block-long line of redstone dust.
Add the down button for the almost prepared elevator. This button will appear on the floating stone block next to the door of the elevator.
Now that your elevator is complete, you can use it to ride up and down unlimited times and you can also decorate it with walls and doors et cetera.
Frequently Asked Questions
1. Can you tell me the requirement for the materials?
Ans- The important materials that are required for this process are pistons, wood (or any solid block), Redstone torches, Redstone repeaters, and 1 wooden stair block in minecraft.
2. What do I don’t know how to go up after building the elevator?
Ans- At the time, you have built the elevator, you need to have to stand on the pressure plate on the bottom left.
3. Is this technique is ideal, in case I playing Minecraft on a phone?
Ans- Sadly, this technique does not work on a phone as it works on a console or a computer, but not on Minecraft PE.
4. Is there any need to use cobblestone?
Ans- Absolutely not. You can use any solid block. But, make sure you do not utilize a block of Redstone, as it would mess things up.