Contents
- 1 How to Fix Video Scheduler Internal Error
- 2 Video Scheduler Internal Error League of Legends
- 3 How to Fix Video Scheduler Internal Error League of Legends
- 4 Video Scheduler Internal Error Fortnite
- 5 How to Fix Video Scheduler Internal Error Fortnite
- 6 Video Scheduler Internal Error Battlefield 4
- 7 How to Fix Video Scheduler Internal Error Battlefield 4
- 8 Solution 1 – Run System File Checker (SFC)
- 9 Video Scheduler Internal Error CS: GO
- 10 How to Fix Video Scheduler Internal Error CS: GO
- 11 Conclusion
The video scheduler internal error causes your computer to crash and thus, poses a lot of problems in front of you. When this error comes, all your work gets stopped and the sad thing is that you are not able to save it also. There are various reasons behind and one of them is the graphic driver issues and issues due to malware.
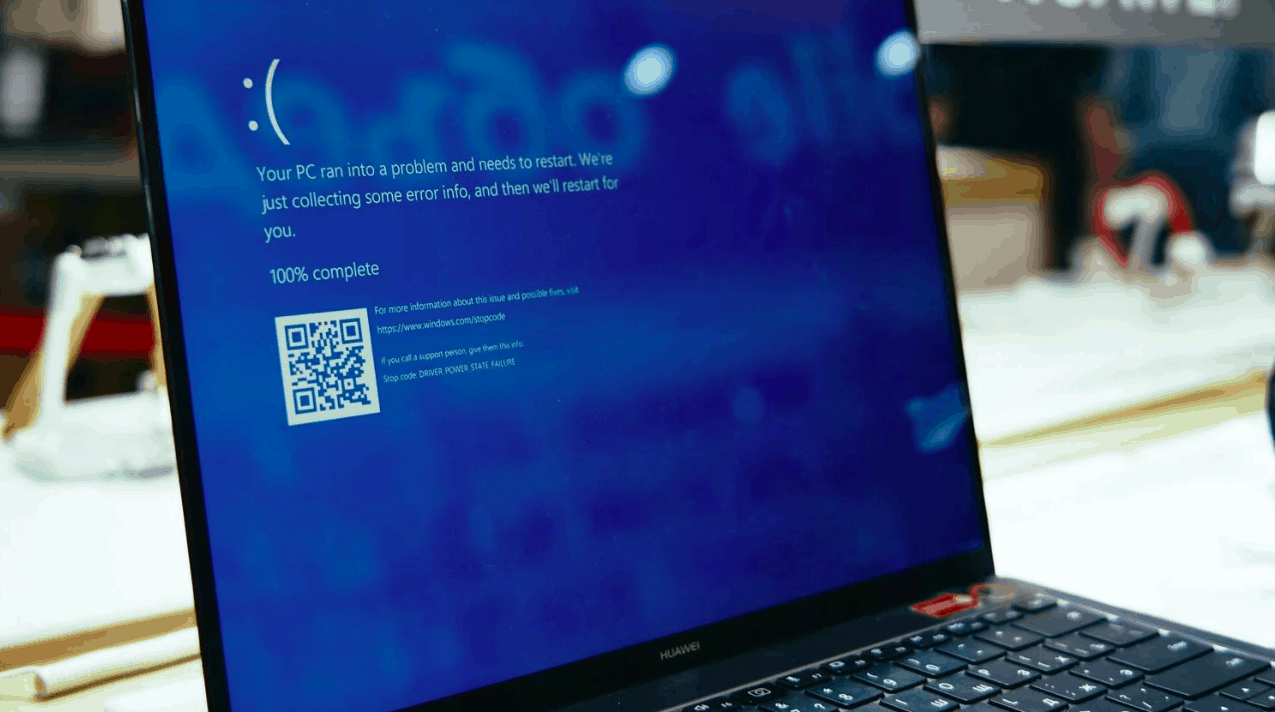
A Blue Screen of Death (BSOD) is technically called a stop error. The serious issue comes before the PC and is asked to stop it completely. BSOD errors can occur in all Windows operating systems, including Windows 7, 8, 10, Windows Vista, Windows XP, and Windows 98/95.
The BSOD error, VIDEO_SCHEDULER_INTERNAL_ERROR, occurs suddenly when you recently installed new hardware or software. It usually indicates that the new software or hardware causes conflict between the video drivers and Windows 10.
The error message reads;
“Your PC ran into a problem and needs to restart. We’re just collecting some error info, and then we’ll restart for you. (0% Complete)”
Reasons behind the error-
Some of the reasons are-
- Outdated or corrupted graphics drivers
- Incompatible drivers
- Malware or virus infection
- Corrupt Windows System files
- Corrupt Windows Registry
- Hardware issues
How to Fix Video Scheduler Internal Error
Let’s see some of the ways to get rid of the error.
Solution 1 – Run System File Checker (SFC) and Check Disk (CHKDSK)
- Step 1: – Press the Windows Logo Key + X simultaneously and then click on Command Prompt (Admin).
- Step 2: – Now input the following in the cmd and hit the enter button on your keyboard:
Sfc /scannow
sfc /scannow /offbootdir=c:\ /offwindir=c:\windows
- Step 3: – Be patient and wait for the process to be complete, and once done, restart your computer.
- Step 4: – Now, you need to run CHKDSK.
- Step 5: – Allow the process to be complete and again reboot your computer to save changes.
Solution 2 – Run DISM (Deployment Image Servicing and Management)
- Step 1: – Press the Windows Logo Key + X simultaneously, then select Command Prompt (Admin).
- Step 2: – Type the following command into cmd one by one and press the Enter button on your keyboard:
Dism /Online /Cleanup-Image /StartComponentCleanup
Dism /Online /Cleanup-Image /RestoreHealth
- Step 3: – If the above command did not work, then you should try the ones below:
Dism /Image:C:\offline /Cleanup-Image /RestoreHealth /Source:c:\test\mount\windows
Dism /Online /Cleanup-Image /RestoreHealth /Source:c:\test\mount\windows /LimitAccess
You will need to replace the C:\RepairSource\Windows with the location of your repair source (Windows Installation or Recovery Disc).
- Step 4: – Instead of running SFC /scannow, you should run DISM command to verify the integrity of the system:
Dism /Online /Cleanup-Image /CheckHealth
- Step 5: – Now, reboot your computer to save changes.
Solution 3 – Uninstall Graphic Card Driver
- Step 1: – Access the device manager and right-click on your NVIDIA graphic card and click on Uninstall. If asked for confirmation, click on Yes.
- Step 2: – Type control in Windows Search, then click on Control Panel from the search result.
- Step 3: – From Control Panel, click on Uninstall a Program.
- Step 4: – Now, uninstall everything related to NVIDIA.
- Step 5: – Reboot your system to save the changes and again download the setup from the manufacturer’s website. In this case, we have the NVIDIA graphics card, so you will download the setup from the NVIDIA website.
- Step 6: – Once you are sure that you have removed everything, try installing the drivers again. The setup should work without any problems.
Solution 4 – Update Graphic Card Drivers
- Step 1: – Press the Windows Logo Key + R simultaneously to open the run dialog box. In the dialogue box, type in “devmgmt.msc” and press the enter button on your keyboard to open Device Manager.
- Step 2: – Now, expand Display adapters and right-click on your NVIDIA Graphic Card and click on Enable.
- Step 3: – Once you have done this again, right-click on your graphic card and select “Update Driver Software.” Select “Search automatically for updated driver software” and wait for the process to be complete.
You might be able to fix the error with the steps above. But if not, then you should continue with these steps:
- Step 1: – Again, click on “Update Driver Software,” but this time, you need to select “Browse my computer for driver software” on the next screen.
- Step 2: – Click on “Let me pick from a list of device drivers on my computer.”
- Step 3: – Now, select the compatible driver from the list for your NVIDIA Graphic Card and click on Next.
- Step 4: – Wait for the above process to be complete and restart your computer to save changes. You may be able to fix Video Scheduler Internal Error after updating the Graphic card.
If you could not update the graphics driver using the steps above, you can try other methods of updating graphics drivers.
Solution 5 – Run Disk Cleanup
This solution is also effective in fixing video scheduler internal error. Disk cleanup is a built-in tool on Windows that helps you delete the required unnecessary and temporary files depending upon your need. To run disk cleanup,
- Step 1: – Go to This PC or My PC and right-click on the C: drive to select Properties.
- Step 2: – Now from the Properties window, click on Disk Cleanup under capacity.
- Step 3: – It will take some time in order to calculate how much space Disk Cleanup will be able to free.
- Step 4: – Now click Clean up system files in the bottom under Description.
- Step 5: – In the next window that opens, make sure to select everything under Files to delete and then click OK to run
- Step 6: – Let the Disk Cleanup complete and then restart your PC to save changes. Again try to run the setup, and this may be able to Fix Video Scheduler Internal Error.
Video Scheduler Internal Error League of Legends
Now, while playing any game, you are faced with BSOD error like League of Legends. Now, it is easy to get rid of the error. But before that, let’s see some of the causes behind this error.
- Incomplete download of the game
- Outdated or corrupted graphics drivers
- Incompatible drivers
- Malware or virus infection
How to Fix Video Scheduler Internal Error League of Legends
Solution 1 – Update your Graphics Card Drivers
If you’re using an NVIDIA graphics card, follow the steps below.
- Step 1: – Press Win + R simultaneously. This operation will invoke the Run dialog box. Enter msconfig, click on OK to open System Configurations. Now, click on the Boot tab and check Safe boot. Click OK
- Step 2: – Click on Restart and boot into Safe Mode. Click on This PC > Local Disk C. You will see the NVIDIA folder. Delete the folder. Open the Run dialog by clicking Start and then Run.
- Step 3: – Enter “devmgmt.msc” in the run box. Click the OK button. The Device Manager window will open.
- Step 4: – Open the “Display Adapters” field and right-click on the NVIDIA adapter you wish to uninstall. Then select “Uninstall.” Click “OK” to remove the adapter from the list and uninstall the driver
- Step 5: – Press Win + R simultaneously to invoke the Run box. Open Systems configuration by entering msconfig. Click on the Boot tab, uncheck Safe boot, and click OK. Now, click on Restart.
- Step 6: – Download the latest NVIDIA driver. Once you are done, install the NVIDIA driver. Click the Custom installation option and tick all the boxes, including the “perform clean install” box. Restart your PC
Solution 2 – Run DISM
- Step 1: – Press the Windows Logo Key + X simultaneously, then select Command Prompt (Admin).
- Step 2: – Type the following command into cmd one by one and press the Enter button on your keyboard:
Dism /Online /Cleanup-Image /StartComponentCleanup
Dism /Online /Cleanup-Image /RestoreHealth
- Step 3: – If the above command did not work, then you should try the ones below:
Dism /Image:C:\offline /Cleanup-Image /RestoreHealth /Source:c:\test\mount\windows
Dism /Online /Cleanup-Image /RestoreHealth /Source:c:\test\mount\windows /LimitAccess
You will need to replace the C:\RepairSource\Windows with the location of your repair source (Windows Installation or Recovery Disc).
- Step 4: – Instead of running SFC /scannow, you should run DISM command to verify the integrity of the system:
Dism /Online /Cleanup-Image /CheckHealth
- Step 5: – Now, reboot your computer to save changes.
Video Scheduler Internal Error Fortnite
Again, BSOD error also comes with video scheduler internal error fortnite. Some of the causes of this error are-
- Incomplete download of the game
- Incompatible drivers
- Malware or virus infection
How to Fix Video Scheduler Internal Error Fortnite
Solution 1 – Deleting the .bat File
- Step 1: – Go to C:\Program Files\Epic Games\Fortnite\FortniteGame\Binaries\Win64\BattlEye
- Step 2: – Click on the Uninstall_BattlEye.bat file (Windows Batch File)
- Step 3: – Click on Install_BattlEye.bat file (Windows Batch File). You should know that the C:\ drive location may vary depending on where you installed Fortnite.
Solution 2 – Run DISM
- Step 1: – Press the Windows Logo Key + X simultaneously, then select Command Prompt (Admin).
- Step 2: – Type the following command into cmd one by one and press the Enter button on your keyboard:
Dism /Online /Cleanup-Image /StartComponentCleanup
Dism /Online /Cleanup-Image /RestoreHealth
- Step 3: – If the above command did not work, then you should try the ones below:
Dism /Image:C:\offline /Cleanup-Image /RestoreHealth /Source:c:\test\mount\windows
Dism /Online /Cleanup-Image /RestoreHealth /Source:c:\test\mount\windows /LimitAccess
You will need to replace the C:\RepairSource\Windows with the location of your repair source (Windows Installation or Recovery Disc).
- Step 4: – Instead of running SFC /scannow, you should run DISM command to verify the integrity of the system:
Dism /Online /Cleanup-Image /CheckHealth
- Step 5: – Now, reboot your computer to save changes.
Video Scheduler Internal Error Battlefield 4
Now, this error also comes while playing Battlefield 4 and the reasons behind it are-
- Incomplete download of the game
- Incompatible drivers
- Malware or virus infection
How to Fix Video Scheduler Internal Error Battlefield 4
Solution 1 – Run System File Checker (SFC)
- Step 1: – Press the Windows Logo Key + X simultaneously and then click on Command Prompt (Admin).
- Step 2: – Now input the following in the cmd and hit the enter button on your keyboard:
Sfc /scannow
sfc /scannow /offbootdir=c:\ /offwindir=c:\windows
- Step 3: – Be patient and wait for the process to be complete, and once done, restart your computer.
Solution 2 – Update Graphic Card Drivers
- Step 1: – Press the Windows logo key + R simultaneously to open the run dialog box. In the dialogue box, type in “devmgmt.msc” and press the enter button on your keyboard to open Device Manager.
- Step 2: – Now, expand Display adapters and right-click on your NVIDIA Graphic Card and click on Enable.
- Step 3: – Once you have done this again, right-click on your graphic card and select “Update Driver Software.” Choose “Search automatically for updated driver software” and wait for the process to be complete.
Video Scheduler Internal Error CS: GO
Now, again, you see BSOD error while playing counter strike- Global offensive game also and there are a few reasons behind it and they are-
- Corrupt game files
- Incompatible drivers
- Outdated or corrupt drivers
How to Fix Video Scheduler Internal Error CS: GO
Solution 1 – Update Graphic Card Drivers
- Step 1: – Press the Windows logo key + R simultaneously to open the run dialog box. In the dialogue box, type in “devmgmt.msc” and press the enter button on your keyboard to open Device Manager.
- Step 2: – Now, expand Display adapters and right-click on your NVIDIA Graphic Card and click on Enable.
- Step 3: – Once you have done this again, right-click on your graphic card and select “Update Driver Software.” Click on “Search automatically for updated driver software” and wait for the process to be complete.
Conclusion
Thus, you see these are the entire details regarding BSOD error and the ways to get rid of the error while playing various games. So, by reading this article, we are sure that you will not have to face this error again.