Contents
All businesses should have an online presence in 2020 – and shops are no different.
With platforms such as Shopify and Wix, setting up an online shop has become relatively easy. No need to program your own eCommerce database and checkout, it is all done for you.
Creating the online shop is the easy part though, getting people to visit your site and actually buy something, is the difficult part!
To get traffic to your website – you will need to invest in at least one ‘channel’. There are four main sources of visitors (or ‘channels’) to any given website – social media referrals, social media ads, Google ‘organic’ traffic and Google ad traffic. You can also look to build ‘direct’ traffic – i.e. the number of people who type your web address directly into their browser – to your website, by building your brand and general awareness of your website, but this can often take years and huge sums of money.
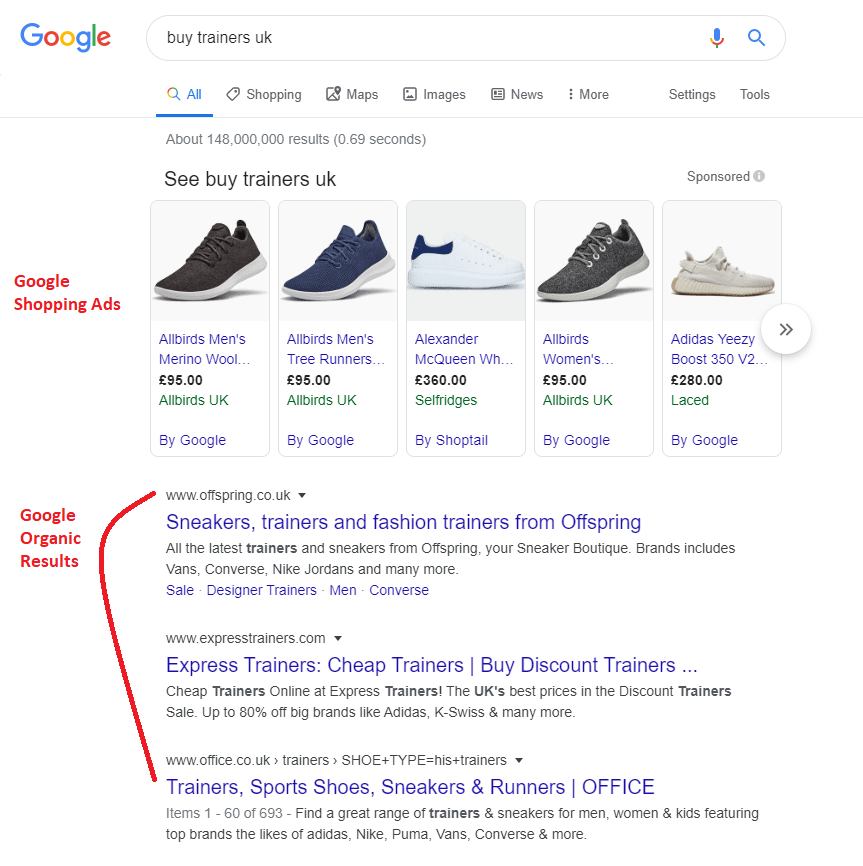
A Search Results Page for Google showing Shopping Ads at the top and Organic Results below
If you need results and sales fast, then using Google Ads is certainly worth considering. Google Shopping Ads is used specifically with eCommerce stores – they are highly effective but are a bit tricky to setup.
This can positively impact your revenue operations over time, as setting up one such Google Shopping Ad with Shopify or WooCommerce can definitely increase your company’s sales figures, visitors and traffic to the website.
Whilst shopify is arguably the easiest platform to use with Google Ads, Woocommerce has a free edition and is generally the choice of those with a degree of technical knowledge.
Today we will look at the process of setting up Google Shopping Ads with Woocommerce.
Sign up to Google Ads & Merchant Center
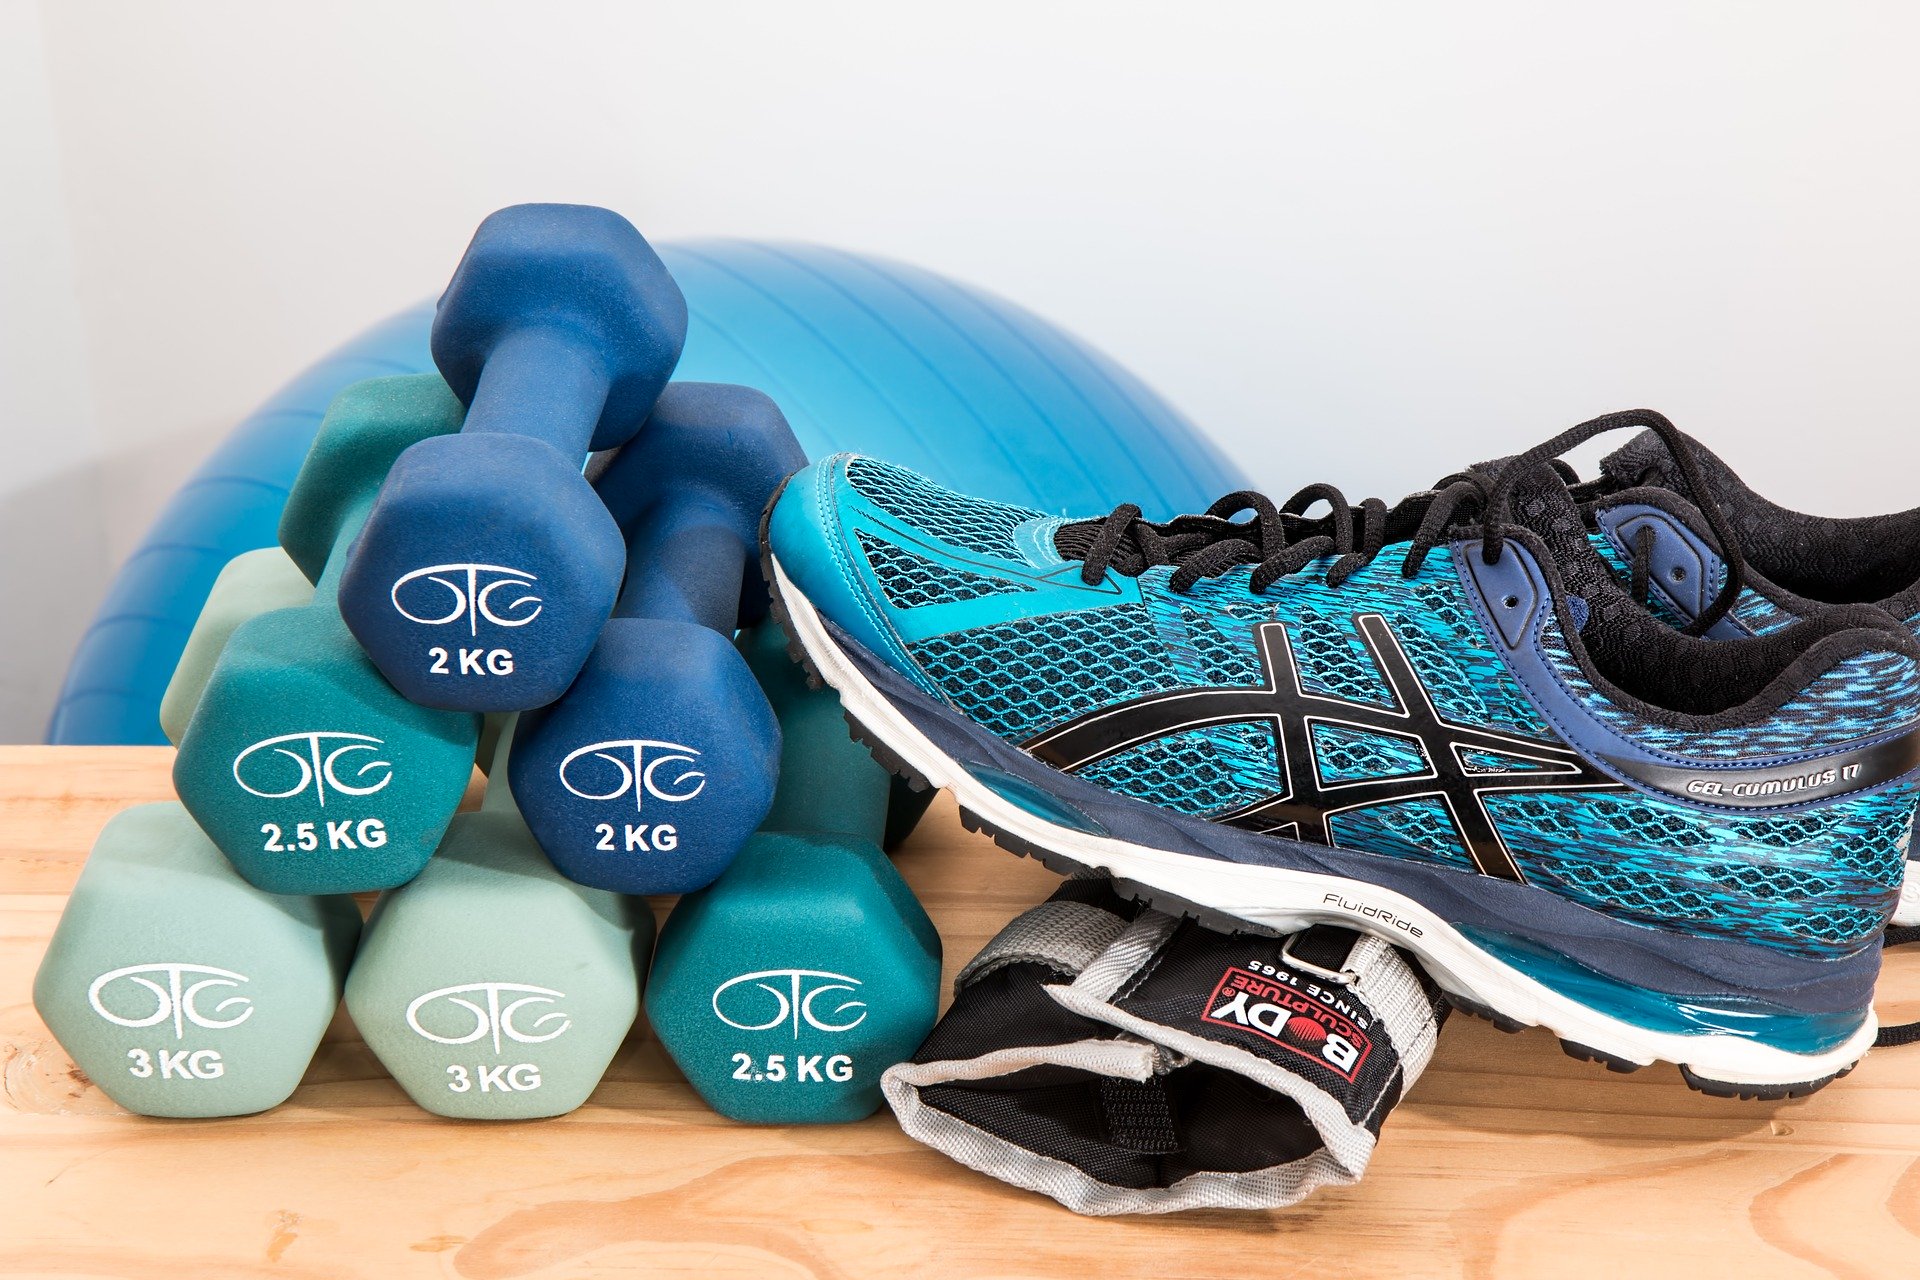
After you have created your eCommerce store, upload the highest quality images that you can – without damaging site speed too much – and add descriptive titles in a set format. You can use a plugin like Smushit to reduce the file size of the images.
The first thing to do, in order to get started with Google Shopping Ads, is to go to Google Ads and the Google Merchant Center websites and complete the necessary steps in order to sign up and create an account.
You will then need to link Google Ads with Merchant Center by going to “Tools & Settings” and then clicking on “Merchant Center”.
Plan Your Ads Campaign(s)
Ensure that you know how much you can afford to pay per click of each advert and still drive a profit. If you for example, make $10 profit when selling a specific pair of sneakers, then you do not want to pay more than $10 for each click!
To work out how much exactly you should pay, you will ideally make a ‘data-driven’ decision based on past performance of your website in terms of “conversion rate”.
If you don’t have any data to use, then you can estimate how much you might need to pay per click, by using the “Keyword Planner” and entering the search terms that you expect your potential customers to use.
Start off with a conservative bid, using the bid suggestion tool and take it from there…
WooCommerce Product Feed Manager plugin
Backup your website – then add the WooCommerce Product Feed Manager plugin.
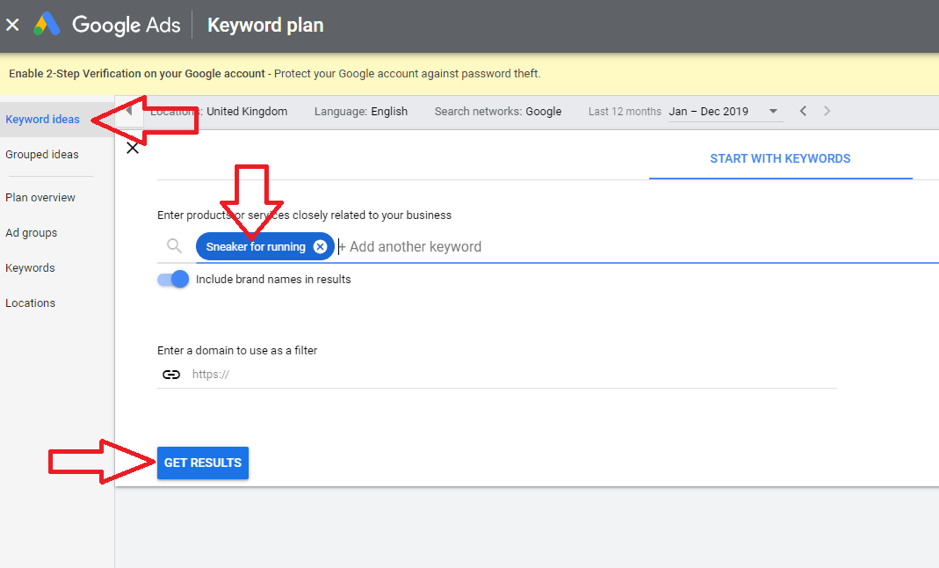
The keyword planner should also help you to determine what search terms/keywords to add to your campaigns.
One quick and easy way to do some ‘keyword research’ is to
- Ask people what they would search for to buy your product
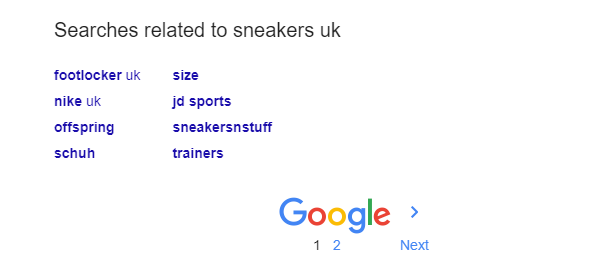
- Enter these terms into Google and note the suggested searches in the search bar
- On the Google search results page – make a note of the suggested searches near the bottom of the page:

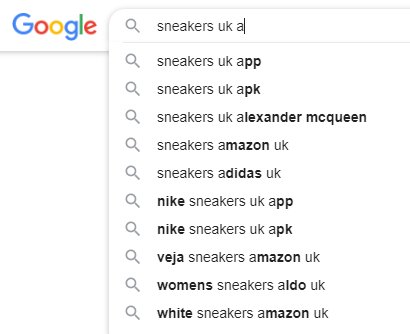
- Using Chrome’s address bar – Add your main search term and add “a” at the end of it for example “sneakers a” – then see if Google predicts any search terms – if they do – take a note of the terms. Then enter “sneakers b” and so on, until “sneakers z”.
Don’t complete the search, just see what Google predicts.
Set Up Your WooCommerce Data Feed
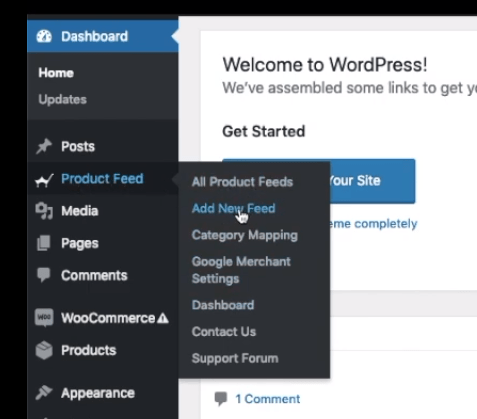
Install the “Woocommerce Data Feed” plugin (at your own risk – backup your website beforehand). Once installed, the plugin’s menu item should appear in the left hand menu – usually near the top. Click the product feed icon/text and then click “Add New Feed”:
Give the feed a title –used “Demo1” in this example.
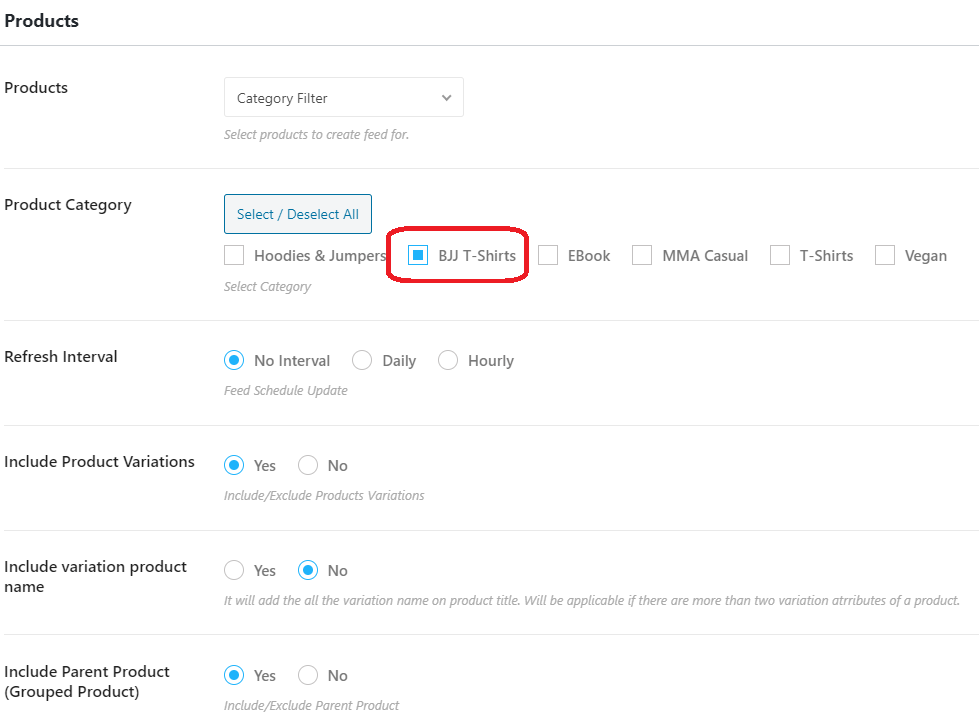
In the first drop down menu – choose if you want to have the feed for the entire website and all of your products, or just one category of products:
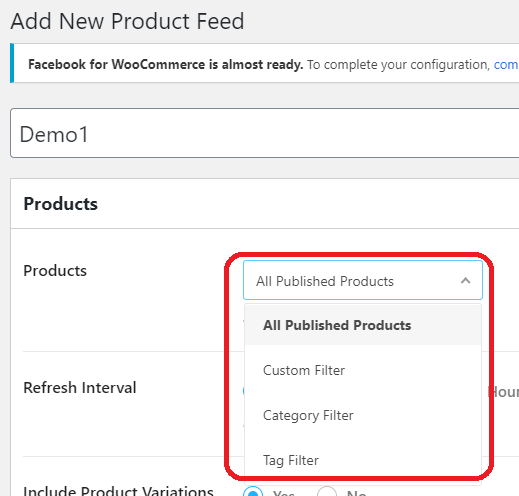
In this example, I’ve chosen to use a category filter – as I don’t want to advertise all of my products – only the “Brazilian Jiu-Jitsu” T-shirts.
For now leave the other options as default:
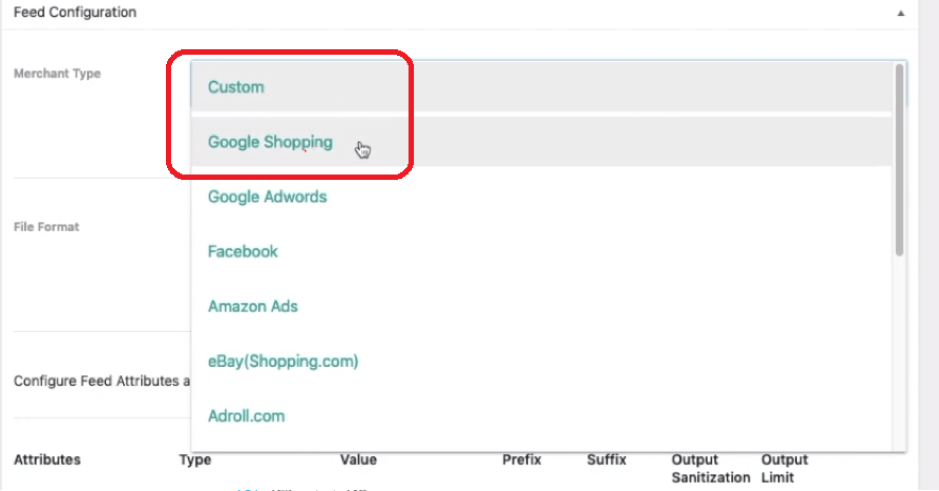
Below all of the product options (shown above) there are a set of “Feed Configuration” options.
The first option in this section, is the “Merchant Type”. On the Merchant Type drop-down menu, select “Google Shopping” – to be presented with the options required to populate the Google Shopping Ads feed correctly.
In theory – all the required fields should be populated automatically:
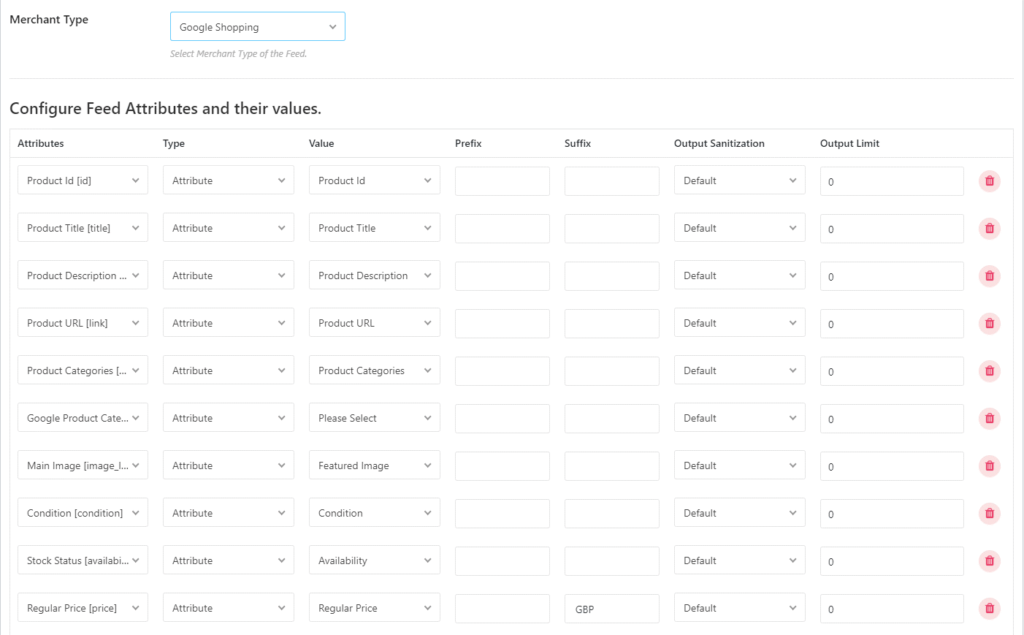
If you wish to add fields, then simply click “New Attribute” or “New Custom Attribute” button at the bottom of the table containing all the predefined attributes.
Click the red bin/trash icon on the right of each attribute if you wish to delete one.
Once you are happy with all the attributes and fields, scroll back up to the top and click “Publish” on the top right of the screen:
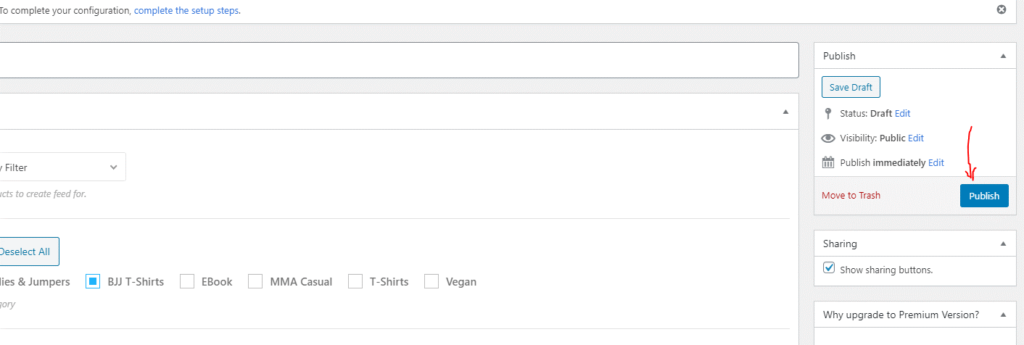
Once it has been published, the options “View Feed” and “Download” should appear on the right hand side.
Add Your Feed to the Google Merchant Center
On the right hand side – as well as being able to click “View Feed” – just above – you should be able to copy the feed URL.
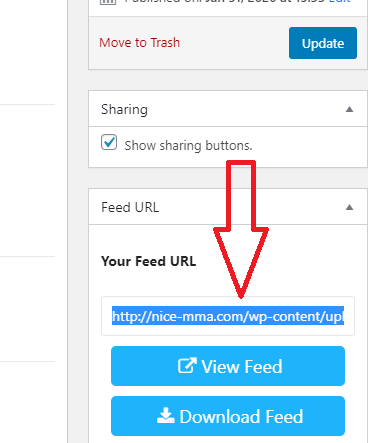
The feed URL should look something like this:
http://nice-mma.com/wp-content/uploads/rex-feed/feed-4651.xml
Keep this window open for now and open a new tab with Google Merchant Center and login.
Once logged in, Click “Products” in the left hand menu, and then “Feeds” and click the big blue + button: 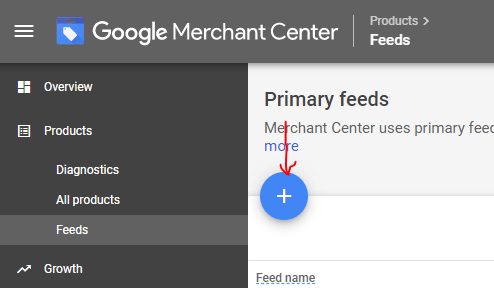
When prompted – fill in the “basic information” about your business, including your location. Next, click “continue” to the “Name and Input Method” section.
Here you will name the feed – the same name as in your WordPress admin (“Demo1” in this case) and then select the “scheduled fetch” option.
Finally copy and paste the feed URL from your WordPress admin section and click “Create Feed”: 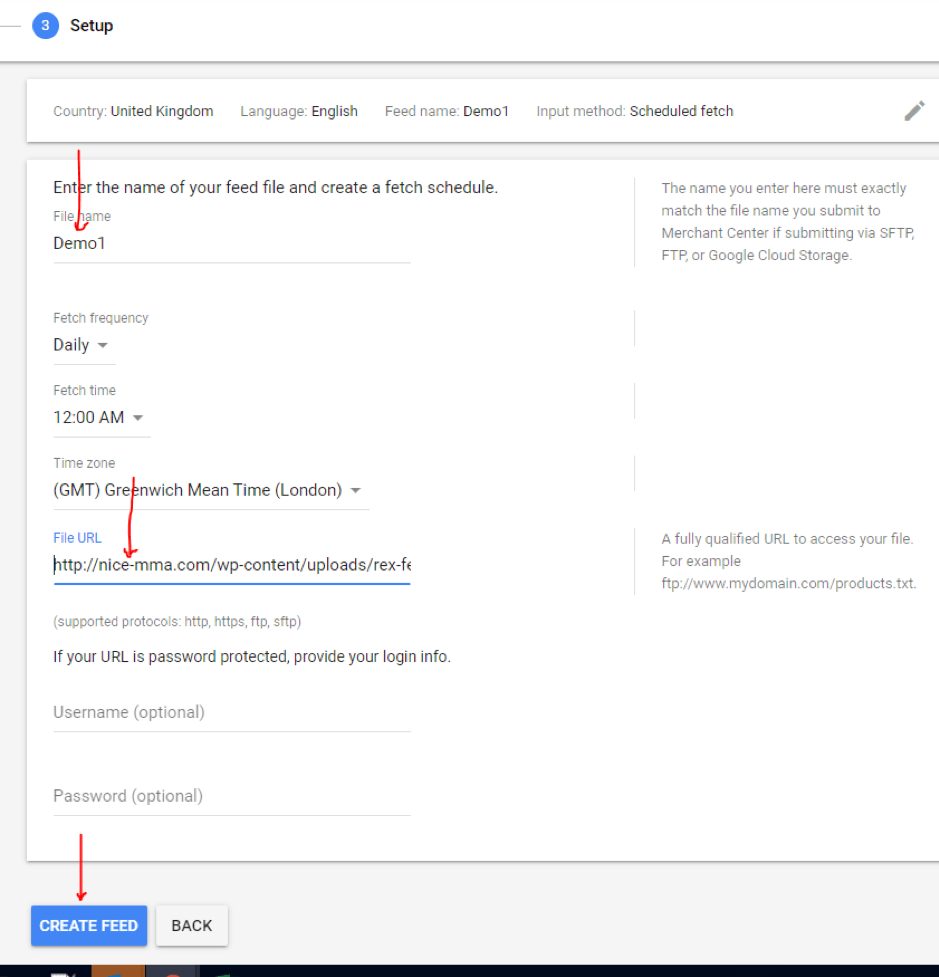
Once processed, click “Fetch Now” 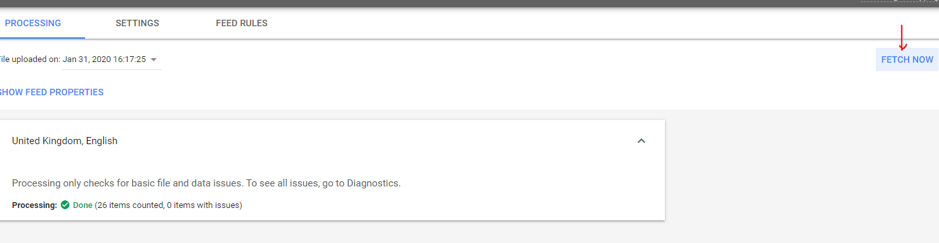
Create Campaign in Google Ads
Please note that in this section, the options that are chosen in the setup process may not be optimum for your products and campaigns. The setup shown is just to get your started.
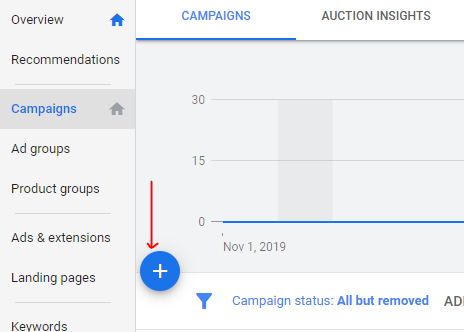
Select “New Campaign” by pressing the big blue button
Next choose “Sales” and “Shopping”
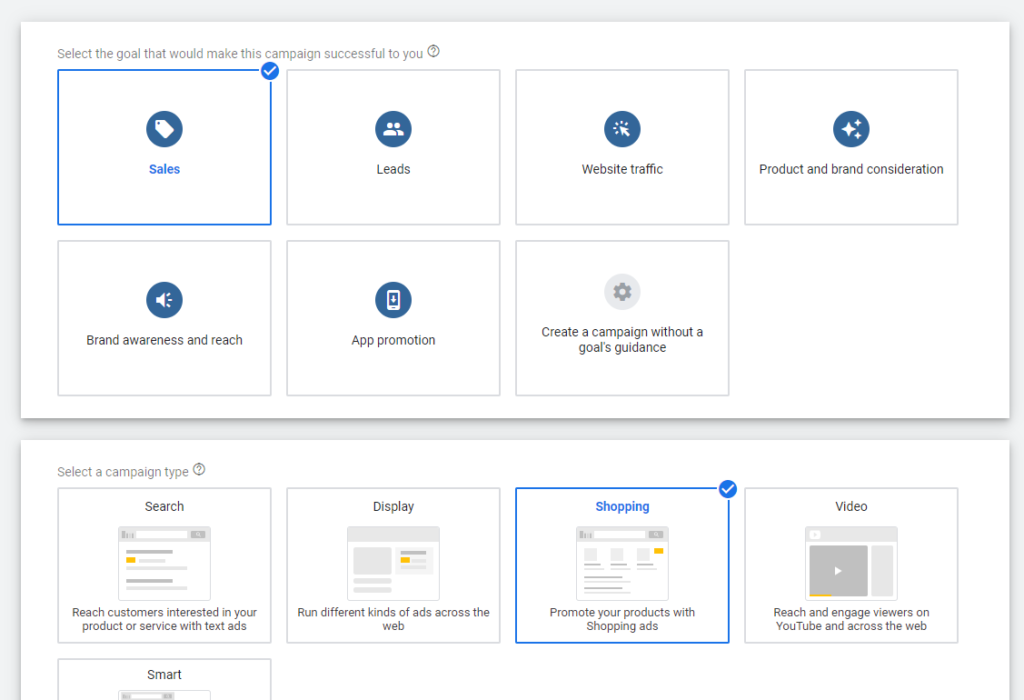
For now – choose “Standard Shopping Campaign” over “Smart Shopping Campaign” in the next section.
On the next screen, give the campaign a name, I’ve chosen “Manual CPC” without any enhancement for the Bidding Strategy and give the campaign a daily budget.
Save the campaign and check that there are no error messages. 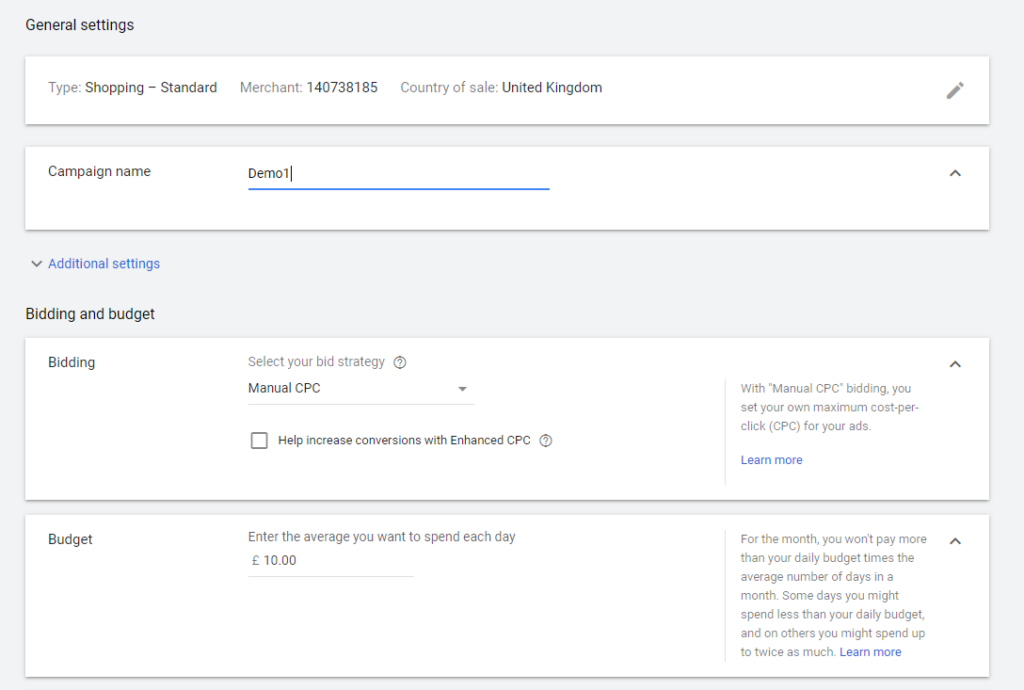
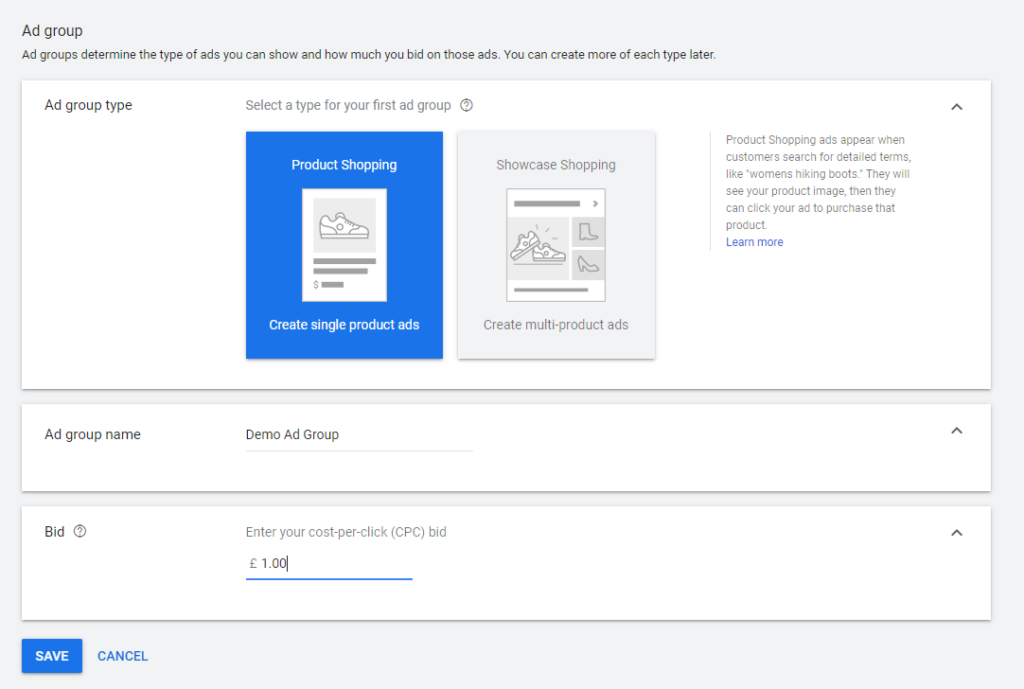
Untick any Display adverts and Youtube adverts.
On the next screen, choose “Product Shopping” and give the ad group a name and a Cost Per Click maximum amount.
Now you need to keep a close eye on everything and ensure that the Shopping ads are showing and also performing!
To do this, you will need to track your cost per conversion and keep an eye on your Return on Ad Spend (ROAS). You will also need conversion tracking setup to see all of your data in Google Analytics. Using Google Tag Manager is regarded as the easiest way to do this.
If you are not getting any clicks – have a look to make sure your images and descriptions are optimised and consider increasing your bids.
If you are getting clicks but not any sales, then ensure that your conversion tracking is properly setup. Once this is confirmed, you may have to read up on Conversion Rate Oprimization – “CRO”.
This is a science and an art in itself, but adding a Unique Selling Point, backed up with a Strong Selling Point and a clear call to action can help. Adding “trust metrics” such as reviews and a local telephone number can also help people feel confident enough to make a purchase. Providing a 24 hour contact telephone number can also have a direct impact on sales (consider using a telephone answering service for this)