Contents
Safety of data is getting more and more important as the entire world is getting highly dependent on technology. If you are working on a computer, it’s highly possible that you are saving your entire data in a hard drive or in multiple such disks. People whose jobs are entirely dependent on computers, saving data and retrieving information are the ones who are most affected by any incident which can result in damage to the computer. So in this article, I am going to talk to you about how you can create an exact copy of a hard drive using disk imaging software for Windows. Let’s get started.
Disk Imaging and Cloning
To save your entire data you can choose the process of disk imaging and cloning, and can even create a mirror image to the data you now have. To do the same you will have to take help of a third party software since this facility is not provided with the operating system itself and also have a separate hard drive with similar or more storage capabilities. Now if you have a desktop computer system then you will have the freedom to choose from an external hard drive or an internal hard drive.
- External hard drives can be connected to the computer system using a USB port but do remember if you are bringing in a Solid State Drive then you will need to have an SSD port attached in your computer.
- On the other hand if you are bringing an internal drive to the scene then you can connect the drive to the SATA port inside the CPU cabinet and it will be connected to the computer.
- If you are trying to clone a laptop or a Macbook then external drives are recommended but if you want you can even go for an internal one. You will then also have to get a USB to SATA converter/connector to connect SATA port to the USB hub.
- Once you have completed the process of disk imaging, you can then disconnect the new hard drive and keep it separately for using it later.
If you are not using a new or a fresh drive for cloning then you may need to erase the previously existing data to make more space if it isn’t spacious enough.
Disk Imaging for Windows Users
To explain the cloning process I will use the application known as Macrium Reflect. It is free, trusted, efficient and quite popular among tech enthusiasts. So before we get started, you will have to download and install a small installer app known as “Home Use”. Launch it after you have installed it and then it will help you to download the actual application that we will be using. After you have downloaded Macrium Reflect, install it using the default options and the process should go smoothly.
Let’s Begin
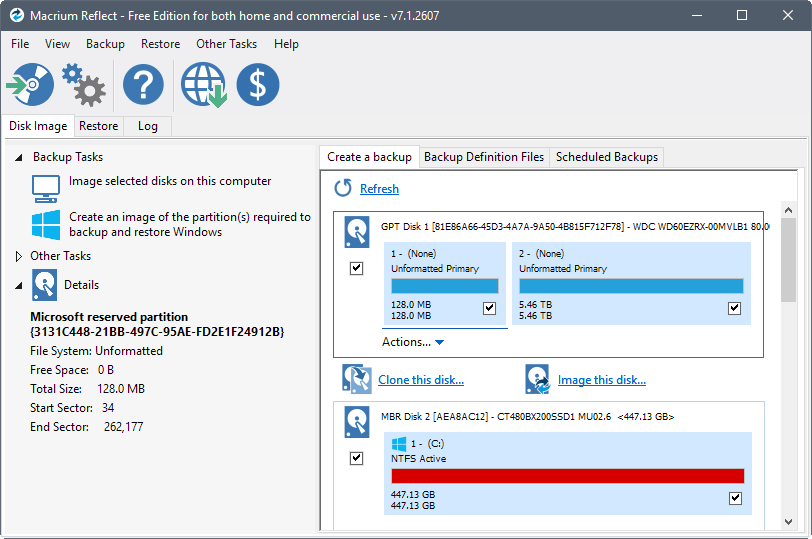
After the installation is complete, launch the application if it does not start on its own. You will see all the disks that are attached to your system and details regarding them, and there you will have to select between two options they are cloning and Imaging.
Disk Cloning:
Cloning is a process in which a user can make an exact copy of his hard drive in another one. Even the operating system files will be copied. It will be like a replica and you will be able to use the secondary disk to even boot your system from it. It is a great option when one doesn’t want to change anything and keep his system as it was.
Disk Imaging:
Disk Imaging on the other hand allows you to create entire copies of your hard disk in the secondary disk, as many times as the storage allows for it.
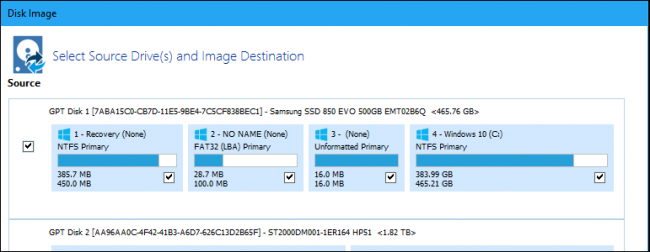
Now after you have decided which option you want to go with, check all the disks and partitions Macrium is showing on your computer. Select the disk and its partitions that you want to clone or image. After that on the next window, you will have to select the destination drive, where all your data will be copied. Do remember that cloning and imaging can destroy all the previously existing data on the disk. So if you have anything important, it is better to take it off. If you are specifically cloning the disk then check out the “Cloning Properties”. Click on the check box which says “Extend main partition to fill up the entire space on the disk”.
There is an interesting option to also schedule the cloning process. If you are busy at the moment then you can schedule the cloning for later when you won’t be using the system. You can also set a regular cloning so that any kind of changes in the data on disk will reflect in the cloned partition too. This can also be done with the disk imaging option too.
What after it?
After you have cloned your primary disk in the secondary one then you can even boot from it to check if the cloning has been done in the correct format. For that you will have to restart your system, go to BIOS settings and change the boot settings. Afterwards the system will restart once more and boot from the secondary one. If you are only imaging the disk then it would be better to leave it plugged in and on schedule, this will make all the changes in the data from time to time without you having to manually do it.
So these were some of the steps on creating an exact copy of a hard drive through disk imaging software for windows that I wanted to share with you. If you face any issues with cloned disk or image disk then you can always clear out the old cloning and make a new one. Sometimes a copy can get corrupted and may not work properly so the best way would be to create a copy and check it afterwards.
Hope it helps.
Thanks for reading!